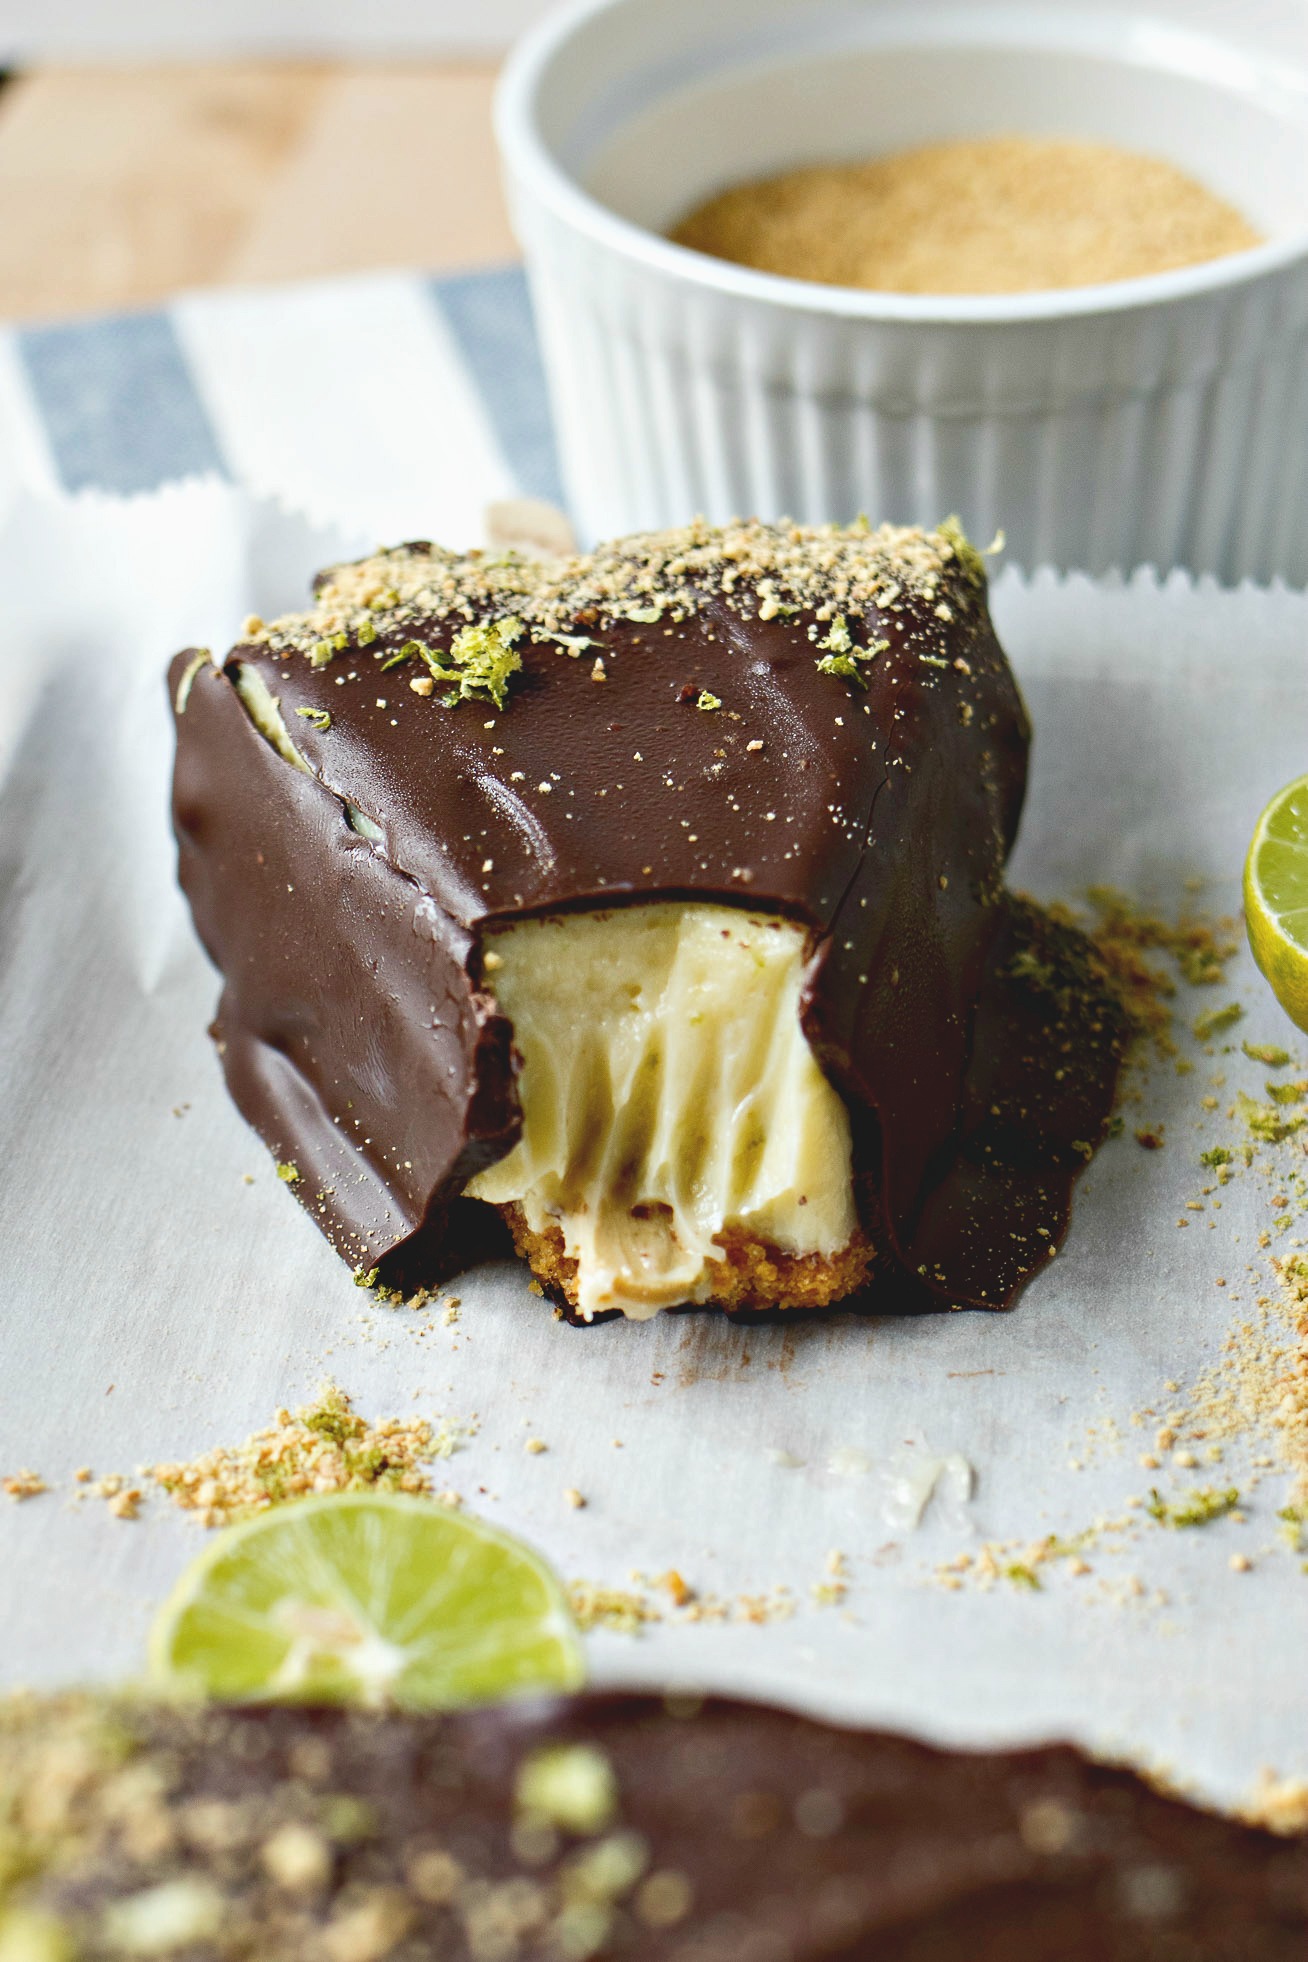
Chocolate-Covered Key Lime Pie – A rich and tangy slice of key lime pie dipped in creamy dark chocolate. It’s a cool and refreshing treat to enjoy all summer long!
 As years go by and I get older, there’s one thing that I’ve learned: my taste in food is NOT set in stone. It constantly evolves. I may think I hate blue cheese, but then, out of nowhere, I suddenly enjoy it. I talked a little about it in this discussion about avocados. And I’m here again to talk about it. This time: citrus and chocolate.
My hatred of citrus and chocolate began with those chocolate oranges that they sold at supermarkets and pharmacies. They were chocolate spheres that came apart in slices, much like oranges do. But the chocolate had a hint of orange flavor added. Do you guys remember these?! I was intrigued by them so I thought, “Hey, let’s give this a try!”
Gross. So gross. Never again.
But, alas, as they do many times, my taste buds changed their mind about this combo. Not exactly the chocolate and orange combo, but close – chocolate and lime.
The evolution began when I went to the Florida Keys with some girlfriends years after my traumatic chocolate orange experience. One of the girls was adamant that we try the Chocolate-Covered Key Lime Pies on a Stick. I didn’t want to put a damper on the excitement – all the girls were so pumped to try these – so I kept my opinions about citrus and chocolate to myself.
Though I was skeptical, I still had an inkling floating in my mind…Should I give this dessert a try? After all, I love seasonal treats! Maybe this could be the dessert that changes everything for me?
And man, was it ever! With the first bite, I instantly fell in love. The pie was cream and tangy and had a perfect amount of crunch from the chocolate and graham cracker crumbs. And I loved how the bittersweet chocolate paired with the tart lime. Yummmm.
So today, I am here to recreate that magical recipe for you guys to try at home. Because sometimes you just can’t make it to the Keys.


These chocolate-covered key lime pie slices were SHOCKINGLY easy to make. All you need to do is make a key lime pie (less than 45 minutes from start to finish), add popsicle sticks, freeze the pie, slice, and then dip in chocolate. Boom! So simple!
And if you want to cut out even more time, you can buy the pie already made from your supermarket bakery. I can’t say I recommend this because the key lime pie is so simple to make yourself. But I can understand the need to cut corners sometimes so I’ll give you a free pass.


Okay so how exactly do you make this pie? Let’s get to it.
Pies are notoriously annoying to make, especially if you have to make two pie crusts (top and bottom). But since key lime pie has a graham cracker crust, it cuts your prep time in half! See, all you need to do for the crust is add melted butter and sugar to store-bought graham cracker crumbs (or make them yourself by crushing 10-12 graham crackers), press into a pan, and bake. Simple as that!
But before you get the crust baking, you gotta mix the filling together and let it sit for 30 minutes to thicken. This step is crucial! The custard thickens up beautifully during this time so don’t skip it! While it’s thickening, make the crust and bake it. Once thickened, add to the baked crust and bake for another 15-20 minutes.
Now all you have to do is let it cool and then freeze before we start dunking in luscious dark chocolate.

Though this recipe is so simple, there are still some tips I have to make sure it goes smoothly for you:
- Although this is a key lime pie, you do not actually need to use key limes for this recipe. In fact, there has been numerous sources that stated that using lime zest and lime juice gives just as strong of a lime flavor as key lime juice does. And coming from experience, it’s soooo much easier to juice regular limes than it is key limes. So go ahead an buy those regular ones, people!
- Now this tip is important so listen up! Please use an aluminium pan when making this pie. After it finishes baking, we need to insert the popsicle sticks. But how do we do that without making a mess of the pie? While the pie is still in the pan, we make a slit with a sharp knife where the stick should go and then insert. Then you place the pie in the freezer and the stick will set as the pie freezes. I tried inserting the stick after it was frozen and it was (1) harder to insert and (2) did not stay in place. So trust me with this one!
- Whenever I am coating things in chocolate, I like to use this melting chocolate because it (1) melts smoothly and (2) hardens when it dries. If you simply use melted chocolate chips for the coating, the coating never hardens into a shell unless you refrigerate. Plus the flavor of this chocolate is perfectly semi-sweet.
- To make it easy to coat these slices in chocolate, I recommend a shallow square dish. I used my glass Pyrex one, but you can use a square or loaf baking pan or something similar. But if you’re using a metal pan, make sure to melt in a microwave safe bowl first and then pour the chocolate into it. If you simply use a bowl, it will make it hard to lay the slice flat down to coat so try to use a square pan, if possible.
Alright, there you have it – the recipe that changed my tastebuds forever! Let me know how much you love it by commenting below! Enjoy!
Here are all the kitchen tools and serveware that I used in today’s recipe. For each item sold below, I make a small commission. I only recommend items that I own and love so you can trust that each recommendation is tried and true. Thank you for supporting CPA!
[show_shopthepost_widget id=”2715641″]
Chocolate-Covered Key Lime Pie
Ingredients
For the crust:
- 1 1/4 cup graham cracker crumbs plus more for garnish
- 1/4 cup sugar
- 5 tablespoons butter salted, melted
- 1 aluminum pie pan
For the pie filling
- 4 large egg yolks
- 4 teaspoons lime zest regular limes (no need for key limes!), plus more for garnish
- 1 14-ounce can sweetened condensed milk
- 1/2 cup fresh lime juice regular limes (about 4-5)
- 1/8 teaspoon salt
For assembly of the pops:
- 8 popsicle sticks
- 20 ounces dark chocolate melting disks
- 1/2 cup vegetable oil
Instructions
- Preheat oven to 325 degrees. First we'll make the filling so it can rest before baking. Add yolks and zest to a medium bowl. Whisk together for two minutes. Add condensed milk, lime juice, and salt and whisk together. Cover mixture and set aside for 30 minutes to thicken up.
- While the mixture thickens, prepare the crust. Mix crumbs, sugar, and butter together until combined. Dump into an aluminum pie pan. Using the bottom of a clean measuring cup, press the crumbs into the edge of the pan to form the crust. Bake in preheated oven for 12 minutes, until the edges start to toast. Remove from oven. Leave the oven on.
- After the 30 minutes have passed, place fillinf in warm pie crust and bake for 15-18 minutes, or until the center is firm. Remove from oven and let it cool for 1 hour. Cut 8 evenly-spaced horizontal slits in the middle of each slice's crust. This is where the popsicle stick will go. Insert stick about half way in. Cover pie and place in freezer for at least 8 hours.
- Once the pie is frozen, remove from freezer. Slice pie into 8 slices and remove from foil pan. Place chocolate melting disks into shallow bowl. I used a square Pyrex dish. Melt in microwave in 30 second-increments until completely smooth. Add oil and whisk together. The oil helps thin out the chocolate to better coat the pie slices. Prepare a baking sheet with parchment paper to place the prepared slices.
- Place a slice into the chocolate and, using a spoon, cover in chocolate. With the back of the spoon, spread off the extra chocolate back into the dish. Place onto prepared baking sheet. Using extra crumbs and lime zest, garnish the chocolate-covered slice. Repeat with the remaining slices. Place into freezer to harden for 30 minutes. Serve immediately or place into storage container for later. Slices will last a week or two.
Notes
Pin for later:

More desserts that you’ll love:
Atlantic Beach Pie

Chocolate Raspberry Mousse

Blueberry Crumb Bars


This totally just blew my mind!! This looks so amazing!! I want it!
This looks amazing! My boyfriend loves key lime pie and chocolate. I’m going to show him this recipe!
You had me at ‘chocolate covered’ and then pretty much slayed me at key lime pie. I never would have thought of this combination. It doesn’t look like it is that hard to make either.
Well this looks like something I need right about NOW omg. Looks so delicious!
I am not the biggest key lime pie fan, but I would LOVE this! Such a cute and fun way to enjoy. Chocolate covered anything is my favorite.
This looks seriously amazing! Can’t wait to try it!
I’ve made key lime pie slices covered in white chocolate, but I’ve never tried dark chocolate. This looks so good! Definitely going to have to give it a go.
At first I thought, “yuck!” But then I thought about how I like orange with chocolate, and decided this would be pretty cool. I was a bit disappointed to see that you used regular limes. They don’t taste the same as Key limes. But, I forgive you 😛 . I’ll try this with a gluten free crust, and we’re good to go!
That’s what I used to think to…until I read this recipe from America’s Test Kitchen. They use tons of fresh lime zest to make the flavor super powerful and tart, so you can’t tell the difference! I was so happy not to have to squeeze those tiny key limes anymore!
This looks absolutely incredible!
Thank you!
These look like a fantastic treat!!! Will definitely have to try them!
Thanks so much!
I didn’t think I could love key lime pie any more than I already do! Definitely gotta try this chocolate covered recipe!
Oh man, you’re gonna be rocked by these!
This sounds and looks amazing!! Totally going to try this at home!
Thanks so much!
Mmm looks so yummy! I love key lime pie!
Thanks!
Well this looks fan-flippin-tastic! Saved to try this weekend!
Thanks so much! Let me know how it goes!
This looks so yum! My husband loves key lime pie so I will have to make this.
Thanks so much!
OMG this recipe looks heavenly! I cannot wait to make it for summer parties 🙂
oh my gosh, this looks insane! I LOVE key lime and then dipped in chocolate. Holy cow, I bet this is to die for!
Thank you!!
I might or might not be drooling. Wish I could take a bite!
Haha give them a try this weekend!
This looks SO delicious! I have to try making this, it’s so pretty too haha! It’d be great for a summer party!!
Aw thanks so much! Yes! If you want to feed more people, you can make these into square bites by baking into a square pan and cutting into 64 pieces.
Oh my goodness, this looks so amazing and delicious! I can’t wait to surprise my husband with this for his birthday. He LOVES keylime pie!
He’s gonna LOOOOVE these! Let me know if you have any questions!
These look absolutely amazing! I will have to give them a try while I have family in town!
Yes! They’re gonna love it!
Alright! These are two of my favorite things! I look forward to trying the recipe!
Let me know how it turns out!
I would never have thought to put these two flavors together! This makes me want to put all sorts of pie on a stick! I’m picturing cheesecake!! 🙂
Heck yes!! Such a great idea. I’m thinking I would dip cheesecake in caramel and then chocolate. What?!?!
This is so clever!!! I think I’ll try this for summer entertaining on our deck!
Thanks so much!
I would never have thought to cover key lime pie in chocolate, but why the heck not?! It looks amazing and I love the presenation.
Thanks so much! So unique but still so simple, right?!
Interesting and looks yummy! Thanks for sharing
Thanks for stopping by!
Ok, this looks to good to be true. My family will be thrilled when I make this for
them.
Thanks so much! Let me know how you like them!