• Facebook
  • Instagram
  • Pinterest
  • RSS
  • Twitter
  • Home
  • About Me
  • Recipes
  • Cookbooks
  • Work With Me
  • Contact

CPA: Certified Pastry Aficionado

Homemade Bagels

bread· breakfast
April 23, 2018

Jump to Recipe Print Recipe

Homemade Bagels – The chewiest homemade bagels you’ll ever make, with the perfect crispy, shiny shell on the outside. You won’t ever want to toast your bagels again after trying these!

Homemade Bagels topped with seasame seeds

Carbs rule my world. No matter how hard I try to avoid them, they manage to sneak back in to my life. And bread is by-far my favorite carb of them all.

I’ve made a few breads on the blog so far, including these garlic herb rolls, this festive pumpkin Challah, and, my most recent attempt, these super-fluffy sweet yeast rolls. And this week I have two more breads to add to the list!

The first is for chewy Homemade Bagels.

Stack of Homemade Bagels with seasame seeds Homemade Bagels cut in half with cream cheese spread on it Bagel spread with cream cheese stacked on each other

I actually tried to make my own bagels years ago. After successfully attempting the classic butter croissants, I felt invincible. Therefore, I felt confident enough to keep attempting more challenging recipes. Welp, the bagels didn’t turn out as great as the croissants, let me tell ya. They were tough and, frankly, not very pretty. So I just kind of gave up on them.

Fast forward almost 7 years later and I decided to go for attempt number two. But not without some research.

To begin my research, I had to decide what was important to me when it came to a great bagel. Here’s what I settled on:

  1. Chewy texture on the inside
  2. Crispy texture on the outside WITHOUT the need for toasting

Yup, those two things are all I needed. When it comes to bagels, I’m surprisingly simple. But don’t be fooled – those two things require very important steps in the bagel-making process.

Here’s what I learned through my research, thanks to the Washington Post and Epicurious:

  1. The bagels need time to rise slowly to help the yeast work its magic. Like a lot of time. So the best recipes I found have the bagels rising overnight in the refrigerator.
  2. Breads need some sugar to feed the yeast. But for bagels, this sugar comes in the form of barley malt syrup. It adds the signature flavor and color to the bagels, so don’t skip this ingredient! I had a tough time finding it at my local grocery store, but Amazon pulled through for me.
  3. Bread flour is a MUST! To get that chewy texture that I require, the flour has to be loaded with the right amount of protein and gluten. Enter bread flour. This also makes the dough much more stiff than, say, cinnamon roll dough. So the kneading process will be a little tougher than you’re used to, probably – at least it was for me.
  4. Like pretzels, bagels need a bath in boiling baking soda water to achieve a gorgeous crust on the outside. The barley malt syrup also comes into play for this step to add more color to the exterior.
  5. And finally, to help get the crust to the perfect crispiness that I love, I gave in and purchased a pizza stone to bake the bagels on. The stone retains heat at the perfect temperature, which helps the bagels cook evenly and build a gorgeous crust on the outside.

Bagel dough on a sheet of flour Cooked bagels covered in seasame seeds

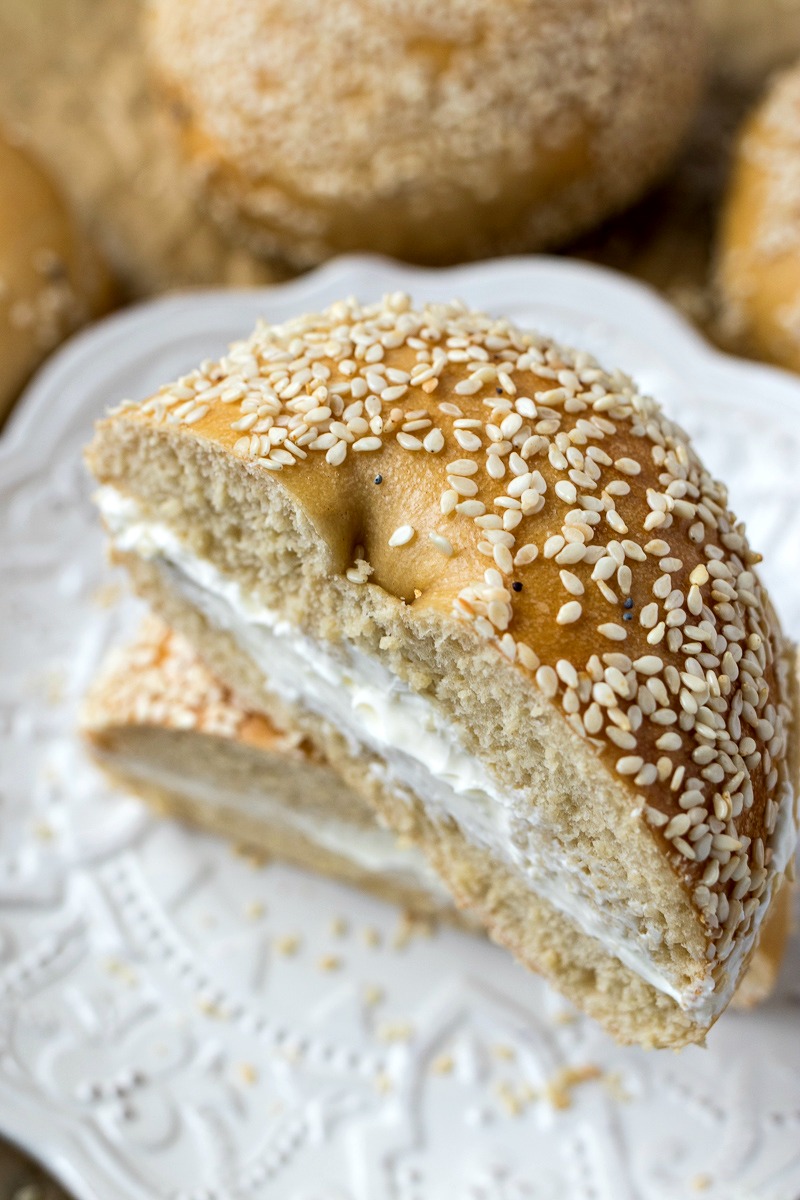
So how did the bagels turn out this time?? Guys….they were INCREDIBLE! Despite all my research and hard work, I was so worried that these bagels would be dry and bland. But they came out so chewy and crispy and heavenly.

I made three kinds: sesame seed, poppy seed, and plain. My absolute favorite bagel is a rosemary and olive oil bagel that I tried a couple years ago at a restaurant in Pittsburgh so keep a look out for this variation next. Or maybe a cinnamon raisin version since it’s my husband’s favorite.

Though you guys have a lot of information above about the bagel-making process, here are a couple more tips I have that are specific to this recipe:

  1. Above, I mention that this dough is tougher than other bread dough. Therefore, your mixer will be working hard to knead this dough so make sure you do not leave your mixer unattended because it’ll be moving around a bit. You don’t want it falling off the counter!
  2. Baking times can vary based on your oven and the size of the bagels. I had some bagels that were ready before others so make sure to keep an eye on the bagels as they reach the end of the baking process, in case they need to be rotated around or removed early.

Alright guys – that’s all I got! Like I said, I’ve got another killer bread recipe for you this week so make sure to come back on Thursday to check it out! Any guesses what it could be???? Hint: olive oil is a MAJOR ingredient.

Here are all the kitchen tools and serveware that I used in today’s recipe. For each item sold below, I make a small commission. I only recommend items that I own and love so you can trust that each recommendation is tried and true. Thank you for supporting CPA!

[show_shopthepost_widget id=”3107890″]

Homemade Bagels spread with cream cheese Stack of bagels with cream cheese

Print Recipe

Homemade Bagels

The chewiest bagels you'll ever make, with the perfect crispy, shiny shell on the outside. You won't ever want to toast your bagels again after trying these!
Prep Time1 hour hr
Cook Time20 minutes mins
Total Time13 hours hrs 20 minutes mins
Servings: 8 bagels

Ingredients

For the bagels:
  • 1 1/2 teaspoons instant yeast
  • 1 1/2 cups warm water
  • 22 ounces bread flour (I measured in grams for more precision - 623 grams)
  • 2 teaspoons salt
  • 4 teaspoons barley malt syrup
  • 3 tablespoons cornmeal for dusting
  • 1/2 cup sesame seeds
  • 1/2 cup poppy seeds
For the bagel bath:
  • 3 quarts water
  • 1 1/2 tablespoons barley malt syrup
  • 1 tablespoon baking soda
  • 1 teaspoon salt

Instructions

For the bagel dough:
  • Place warm water in a small bowl. Sprinkle instant yeast over the water and let it sit to foam a little. It should take no more than 10 minutes. If it does not foam, the water was not the right temperature or the yeast is dead (expired). Prepare large baking sheet by dusting with cornmeal. Set aside.
  • Combine flour, salt, and barley malt syrup in the bowl of a stand mixer using a dough hook. Add in yeast mixture and mix on low or until dough starts to come together, about 4 minutes. Now it's time to knead the dough. Increase speed to medium-low and beat for 7-10 minutes or until the dough is smooth and stiff. It should not be sticky, whatsoever.
  • Remove dough from bowl and onto clean work surface. Cut dough into 8 equal pieces. Roll into smooth bowls and place on prepared baking sheet. Cover with plastic wrap and let the dough sit, untouched, for 5 minutes.
  • Once rested, remove one dough ball from baking sheet, Using your thumb, poke a hole all the way through the center of the ball. Using your thumb as a guide, expand the hole to make the bagel shape. The dough should form a 4-inch bagel. Repeat with the other dough balls. Place the dough balls back onto baking sheet and cover tightly with plastic wrap. Place in refrigerator to rise overnight (about 12-14 hours).
  • When you're ready to make the bagels, place pizza stone in the oven and preheat to 450 degrees. Let it preheat for 30 mins-1 hour. Before we bake, we'll dip the bagels in a bath. See below.
For the bagel bath:
  • While the oven preheats, let's dip the bagels in a bath to give them the shiny exterior. Fill large pot with 3 quarts of water and bring to a rolling boil. Reduce to a gentle simmer and then add barley malt syrup, baking soda, and salt. Give it a stir to combine.
  • Place 3-4 bagels into bath and let them poach for 45 seconds. Flip and poach for another 45 seconds on the other side. Remove from liquid with a slotted spoon. Place onto cornmeal baking sheet and cover with sesame seeds, poppy seeds, or keep plain. Repeat with rest of the bagels.
  • Once oven is preheated, add all bagels to pizza stone using a large spatula or pizza peel. If your pizza stone isn't large enough to hold all the bagels, bake them in batches. Bake bagels for 12-15 minutes or until they reach a nice golden brown top. Rotate bagels if some are browning faster than others.
  • Remove from oven and let the bagels cool for at least 10 minutes before serving. Slice with a serrated knife and serve with your favorite spreads, like butter or cream cheese! Bagels are best on the day they're baked. But you can freeze the leftovers for up to two months. To defrost, microwave for 30 seconds.

Notes

Bagel recipe adapted from Washington Post

Pin for later:

Homemade Bagels photo collage

Other recipes you’ll love:

Classic Butter Croissants

Classic Butter Croissants in front of a jar of preserves

Pumpkin Challah

Pumpkin Challah cut into slices and buttered

Sweet Yeast Rolls

Plate of three sweet yeast rolls

Share this:

  • Click to share on Pinterest (Opens in new window)
  • Click to share on Facebook (Opens in new window)
  • Click to share on Twitter (Opens in new window)
  • Click to share on Tumblr (Opens in new window)
  • Click to email this to a friend (Opens in new window)

35 Comments

« Pineapple Sorbet
Rosemary & Olive Oil Focaccia Bread »

Comments

  1. Alexis D. says

    April 24, 2021 at 3:35 pm

    These are the best bagels I have EVER made. I started making bagels sometime in October 2020 after I realized that it is actually quite simple, just time consuming, and haven’t looked back. However, I have been wanting to up my bagel game, better texture and rolling technique. This recipe was perfect for what I wanted my bagel to taste like and the perfect fluffiness. I will say that I did not have malted barley syrup, so in the bagel mix I used 1/2 the amount called for of white sugar instead and the same for the water solution but with brown sugar. Thanks for the great recipe!

    Reply
  2. Anne Jones says

    January 31, 2021 at 4:22 pm

    Can these be made with bread machine dough? Would there be any alterations?

    Reply
    • Sharon says

      February 14, 2021 at 1:42 pm

      I highly doubt it. However, I have never used bread machine dough so I have no clue what consistency it will bring.

      Reply
  3. Bybagelbabe says

    May 1, 2018 at 11:49 pm

    THESE BAGELS ARE STUNNING

    Reply
    • Sharon says

      May 3, 2018 at 10:55 am

      Thanks so much!

      Reply
  4. Michelle Blackwood says

    April 29, 2018 at 11:09 pm

    Oh, my your bagels look so amazing, I haven’t made bagels in years but now I’m so inspired!

    Reply
  5. Jessica (Swanky Recipes) says

    April 29, 2018 at 7:09 pm

    I’ve been craving bagels lately and have found myself buying way too many varieties at the grocery store. I have some extra time on my hands this week and will be trying this recipe next!

    Reply
  6. Carrie Ditton says

    April 29, 2018 at 5:33 pm

    Oh my goodness I have always wanted to try to make bagels! Yours turned out marvelous. I am going to venture the courage and try your recipe.

    Reply
  7. Amanda Mason says

    April 29, 2018 at 4:10 pm

    WOW! You knocked this recipe out of the park! And those pictures!!! You make it look so easy! I’ve not made bagels before but when I do THIS is the recipe to try!

    Reply
  8. Tina says

    April 28, 2018 at 9:42 am

    I am so glad you didn’t give up on making bagels, these look amazing. You give me hope that someday i can make these. Thanks for the step-by-step, very helpful!

    Reply
  9. Jessica Robinson says

    April 27, 2018 at 10:04 pm

    Can I admit I’ve never made homemade bagels?! These look so darn good and not that hard to make! They look perfect!

    Reply
  10. Amy Treasure says

    April 27, 2018 at 5:29 am

    I’ve never attempted anything like this but you’ve made it look so doable. I think my family would be so impressed if I whipped up a batch of these!

    Reply
    • Sharon says

      April 27, 2018 at 1:18 pm

      Aw thanks! They’re so worth the effort!

      Reply
  11. Abby @ WinsteadWandering says

    April 25, 2018 at 3:29 pm

    I had always heard homemade bagels are wayyy more trouble than they’re worth, but these just seem more time-consuming than difficult. I’ll have to add them to my must-make list!

    Reply
    • Sharon says

      April 27, 2018 at 1:28 pm

      Very true! Let me know how they turn out!

      Reply
  12. Elaine @ Dishes Delish says

    April 25, 2018 at 2:53 pm

    I have never made bagels before! Your bagles look so delicious! I am ruled by carbs too and I can’t wait to make your delicious recipe!

    Reply
    • Sharon says

      April 27, 2018 at 1:28 pm

      Let me know how they turn out!

      Reply
  13. Dominique | Perchance to Cook says

    April 25, 2018 at 9:22 am

    These look like they came from a bagel shop! I can’t believe they are homemade! They look so fluffy and thick. DROOL

    Reply
    • Sharon says

      April 27, 2018 at 1:29 pm

      Aw thanks so much!

      Reply
  14. Taylor Reese says

    April 24, 2018 at 9:59 am

    I love bagels!! I can’t wait to try and make my own.

    xo
    Taylor
    http://www.reeseshardwear.com

    Reply
    • Sharon says

      April 27, 2018 at 1:30 pm

      Let me know how they turn out!

      Reply
  15. Heather Gilbert says

    April 24, 2018 at 12:44 am

    I love a good bagel. I’m pumped now I can make my own.

    Reply
    • Sharon says

      April 27, 2018 at 1:31 pm

      Yay! Hope you try them out soon!

      Reply
  16. Lisa Bryan says

    April 23, 2018 at 11:40 pm

    Wow – they look so light and fluffy! Bagels are something I’ve never made at home but these look so great I might give it a try!

    Reply
    • Sharon says

      April 27, 2018 at 1:35 pm

      Thanks so much! Let me know if you try them!

      Reply
  17. Lisa L Bynum says

    April 23, 2018 at 9:41 pm

    Oh, those poppy seed bagels! Those are my fave. They look delicious.

    Reply
    • Sharon says

      April 27, 2018 at 1:38 pm

      Thanks so much!

      Reply
  18. Annemarie says

    April 23, 2018 at 9:17 pm

    These look better than store-bought bagels! I’m so impressed. My kids would love these.

    Reply
    • Sharon says

      April 27, 2018 at 1:39 pm

      Aw you’re so sweet! Thanks so much!

      Reply
  19. Monica | Nourish & Fete says

    April 23, 2018 at 6:49 pm

    Oh my goodness, these look incredible. I’m with you – chewy inside and crisp exterior are my bagel must-haves. These certainly look like they knock both out of the park! I will be super excited to see the rosemary olive oil version – that sounds amazing!

    Reply
    • Sharon says

      April 27, 2018 at 1:40 pm

      Thanks so much!

      Reply
  20. Leslie says

    April 23, 2018 at 5:41 pm

    I love a good bagel. Thanks for all the great tips for achieving the perfect chew and crust! My favorite is an everything bagel. They make such good sandwiches.

    Reply
    • Sharon says

      April 27, 2018 at 1:41 pm

      Ah so true! I gotta make those next!

      Reply
  21. celeste wright says

    April 23, 2018 at 2:18 pm

    Thanks for the recipe! It is such a fun idea to make bagels. I might just have to try this soon!

    Reply

Trackbacks

  1. Rosemary & Olive Oil Focaccia Bread says:
    April 26, 2018 at 6:26 am

    […] chatting about my homemade bagels earlier this week, I told you how much of a carbaholic I am . Welp, count yourself lucky because […]

    Reply

Leave a Reply Cancel reply

Your email address will not be published. Required fields are marked *

This site uses Akismet to reduce spam. Learn how your comment data is processed.

Hi, my name is Sharon. I’m an accountant by day, risk-taking baker and food enthusiast by night. Come join me as I share my favorite recipes and test out new ones along the way!

fall flavors

angled view of cup of dirt pudding

Cup of Dirt Pudding

Pumpkin Tres Leches

zoomed in shot of Sage & Browned Butter Hasselback Sweet Potatoes, shot from a side angle

Sage & Browned Butter Hasselback Sweet Potatoes

a bowl of Pumpkin Snickerdoodle Bread Pudding topped with ice cream with a casserole dish with bread pudding and two pumpkins stacked on top of each other in the background, shot from a side angle

Pumpkin Snickerdoodle Bread Pudding

overhead shot of partially eaten baked carrot cake oatmeal in casserole dish with serving spoon

Baked Carrot Cake Oatmeal

oatmeal rolls sitting on a baking sheet

Oatmeal Dinner Rolls

ORDER MY NEW COOKBOOK NOW!

photo of entertaining made easy cookbook available for preorder now

Breakfast
Appetizers
Entrees
Salads
Sides
Drinks
Desserts
Roundups
Holidays

Browse by Date

  • Home
  • About Me
  • Contact Me
  • Privacy Policy

holiday favorite

Sweet Corn Risotto with Crispy Shrimp - Creamy, cheesy homemade risotto is taken up a notch with fresh sweet yellow corn and paired perfect with SeaPak Butterfly Shrimp and Clos du Bois Chardonnay.

Sweet Corn Risotto with Crispy Shrimp (+ wine pairing)

Peach & Goat Cheese Crostini on a platter topped with basil and balsamic vinaigrette, shot from a side angle

Peach & Goat Cheese Crostini (+wine pairing)

baked brie with roasted pears and walnuts on top

Roasted Pear Baked Brie

zoomed in shot of chocolate snickerdoodles on parchment paper with a spoon in front, shot from a side angle

Chocolate Snickerdoodles

a plate of pistachio snowballs with one cut in half on top of the plate, shot from the front

Pistachio Snowballs


I used to love cooking, but during busy weeks it f I used to love cooking, but during busy weeks it felt like a chore. I was too exhausted after work to make anything fun. But with all that time at home, I was able to rethink our favorite foods and make them more achievable for weeknights.

I'd always loved mojo pork (that Cuban citrus-marinated pork that's SO flavorful), but I never made it because traditional pork loin takes FOREVER to roast. But then I had a lightbulb moment: What if I used pork TENDERLOIN instead? 

We eat it all the time because it's lean, quick-cooking, and my husband can grill it in under 30 minutes. Why not marinate it in mojo?

Here's what makes this recipe a weeknight winner:
🍊 The Marinade: Orange juice, lime juice, garlic, cumin, and oregano create that classic Cuban flavor. Just dump everything in a bag and let it work its magic!
⏰ The Timeline: Marinate for 4-24 hours (I usually do overnight), then it's only 25 minutes of active cooking time. Quick sear + oven = done!
🍽️ The Versatility: Serve it with rice and beans, make tacos, top a salad, use for Cuban sandwiches, or meal prep it for the week!

Three critical tips:
-DRY the pork after marinating: This is SO important! Pat it completely dry before searing or you'll steam it instead of getting a beautiful crust
-Use a meat thermometer: Pull it at 145°F for perfectly juicy pork every time. No guessing, no cutting it open repeatedly
-Don't over-marinate: 24 hours max or the texture gets mushy!

This has become one of our absolute go-to meals. It tastes like you spent hours in the kitchen but it's secretly SO easy!

Want the full recipe? 💌 Comment 'MOJO' below and I'll send you the link!

#MojoPork #PorkTenderloin #CubanFood #WeeknghtDinner #EasyDinner #DinnerIdeas #MarinadeRecipe #HealthyDinner #MealPrepIdeas #QuickDinner
Can we talk about how guava and cream cheese is TH Can we talk about how guava and cream cheese is THE most underrated flavor combination ever?! 

Growing up, guava was always around. My dad would spread it on toast with butter every morning, and I did the same. But it wasn't until I had guava with cream cheese at a Latin bakery in Florida that I truly appreciated this tropical fruit. 

The cream cheese perfectly balances the tangy guava jelly and makes everything ultra creamy. Wrapped in flaky puff pastry? KILLER.

I know this pastry braid looks super fancy and complicated, but here's the secret: IT'S SHOCKINGLY SIMPLE. When I first saw a pastry braid, I was so intimidated by how intricate it looked. It felt almost unattainable without tons of practice. But I'm here to tell you that is absolutely not the case!

Here's the whole process:
1️⃣ Roll out puff pastry and cut slits on the sides
2️⃣ Spread cream cheese and guava down the center
3️⃣ Overlap the side pieces to create the braid
4️⃣ Brush with egg wash and sprinkle with coarse sugar
5️⃣ Bake until deep golden brown

THAT'S IT! The braiding technique is so much easier than it looks, and the result is absolutely stunning.

Two critical tips:
-Keep it COLD before baking: Cold puff pastry = steam when it hits the hot oven = flaky layers! If the butter is too warm, it won't puff properly.
-Bake until DEEP golden brown: Not just golden, but DEEP golden. This ensures crispy, flaky pastry that's cooked all the way through. Nobody wants soggy pastry!

This is perfect for brunch, dessert, or honestly just because you want something that looks impressive but is secretly easy to make. You can also substitute any fruit preserves if you can't find guava!

Want the full recipe? 💌 Comment 'GUAVA' below and I'll send you the link!

#GuavaPastry #PuffPastry #PastryBraid #LatinDesserts #CreamCheese #BrunchRecipes #HomemadePastries #BakingFromScratch #WeekendBaking #ImpressiveButEasy
Do you remember those Danish butter cookies that c Do you remember those Danish butter cookies that came in the fancy blue tin? The ones your mom would buy every Christmas and you'd go absolutely CRAZY for? 

Well, guess what? You can make them YOURSELF! And they're shockingly simple!

I'm talking about those perfectly crispy-on-the-outside, melt-in-your-mouth-on-the-inside shortbread cookies that are basically edible butter. And honestly? 

I don't think they should be reserved just for the holidays. These cookies deserve to be eaten ALL YEAR LONG!

Here's what makes them so special:
-The Recipe: Only FIVE ingredients—butter, flour, sugar, eggs, and vanilla. That's it! If you can cream butter and sugar together, you can make these.
-The Texture: They're like shortbread cookies but slightly softer, so when you bite into them, they literally melt in your mouth. It's pure butter heaven.
-The Secret: Use European-style butter! It has a higher fat content which makes these cookies extra creamy and flavorful. It's worth the upgrade, I promise!

Important tips:
Be VERY careful measuring your flour—too much and the dough will be impossible to pipe
Use a LARGE star tip (not a small one!) or you won't be able to squeeze the dough out
These actually taste BETTER after they cool! The crispiness is what makes them so good, so resist eating them warm (I know it's hard!)

These are perfect for coffee breaks, gift-giving, parties, or honestly just because you deserve a good cookie. You can make them in under an hour from start to finish!

Want the full recipe? 💌 Comment 'BUTTER' below and I'll send you the link!

#DanishButterCookies #ButterCookies #ShortbreadCookies #HolidayBaking #CookieRecipe #HomemadeCookies
After making approximately ONE MILLION pumpkin tre After making approximately ONE MILLION pumpkin treats recently, I was desperate for something with all those cozy fall vibes but maybe... a little less pumpkin? 

So I set my sights on something that doesn't get nearly enough love in the dessert world: SWEET POTATOES! 

And here's my controversial opinion: Sweet potato beats pumpkin ANY DAY OF THE WEEK. There, I said it! 

These Sweet Potato Cupcakes are super moist, perfectly spiced, and topped with the creamiest cinnamon cream cheese frosting. 

They taste similar to pumpkin cupcakes (so if you're a die-hard pumpkin lover, you can absolutely swap in pumpkin puree!), but here's why sweet potato wins:
✨ More starch = MORE moisture and density in the cupcake
✨ The flavor is 100x better (fight me on this!)
✨ That perfect balance between sweet and earthy

But what I'm MOST proud of is how the frosting and cake work together. You know how sometimes you get a cupcake with frosting that's way too sweet so you just eat the cake? Or killer frosting but blah cake so you only eat the frosting? NOT THIS CUPCAKE. 

The spiced cake needs a little sweetness to balance it out, and the tart cream cheese frosting is PERFECT. They're soulmates! 

Important tips:
-Don't undercook them or they'll sink in the center (but more frosting fixes everything!)
-Fill the liners 3/4 full—not all the way—to get exactly 12 cupcakes
-Use a 2M Wilton tip for that fancy frosting swirl (or just spread with a knife!)

Want the full recipe? 💌 Comment 'CUPCAKE' below and I'll send you the link!
Team Sweet Potato or Team Pumpkin? Let me know in the comments! 

#SweetPotatoCupcakes #CreamCheeseFrosting  #CupcakeRecipe
Y'all, I need to talk about these Kentucky Derby C Y'all, I need to talk about these Kentucky Derby Cookie Bars because they might just be the most decadent thing I've ever created!

So here's the deal: I love taking traditional recipes and giving them a major upgrade. 

Traditional Derby Pie is delicious, but I wanted to make something even MORE special. And these bars? They're Derby Pie on steroids!

Here's what makes them absolutely incredible:
The Cookie Crust: Instead of regular pie crust, we're using a thick chocolate chip cookie base. Game. Changer.
The Filling: Loaded with pecans, chocolate chips, and a hint of bourbon that adds this rich, complex flavor. The filling is more dense and cakey than traditional Derby Pie, which gives you the perfect chewy texture.
The Bourbon Caramel: This homemade bourbon caramel sauce is what takes these bars over the top. It's sweet, buttery, and has that gorgeous bourbon depth. And yes, the alcohol cooks out, so it's safe for everyone (even made these while I was pregnant!)!

Important tips:
Don't chop your pecans too finely—leave nice chunks for better texture
If the bars start browning too quickly, just cover them with foil while the center finishes baking
Don't over-thicken the caramel sauce on the stove—it will thicken as it cools!

These bars are perfect for Derby Day (obviously!), but honestly, they're amazing for any summer gathering, BBQ, or potluck. 

Want the full recipe with that bourbon caramel sauce? 💌 Comment 'DERBY' below and I'll send you the link!

#DerbyPie #CookieBars #BourbonDesserts #PecanDesserts

Copyright © 2026 Certified Pastry Aficionado · Web Design by Viva la Violet

loading Cancel
Post was not sent - check your email addresses!
Email check failed, please try again
Sorry, your blog cannot share posts by email.