• Facebook
  • Instagram
  • Pinterest
  • RSS
  • Twitter
  • Home
  • About Me
  • Recipes
  • Cookbooks
  • Work With Me
  • Contact

CPA: Certified Pastry Aficionado

Mongolian Beef

beef entrees· entrees
May 18, 2020

Jump to Recipe Print Recipe

Mongolian Beef – Tender strips of beef and vegetables are cooked in a sweet and savory soy sauce and served over a bed of rice or lo mein noodles.

Plate of Tender strips of beef and vegetables cooked in a sweet and savory soy sauce and served over a bed of rice or lo mein noodles.

When it comes to Chinese food, I tend to stick to what I know and love: sesame chicken, sweet & sour chicken, and orange chicken. All chicken dishes and all sweet. How predictable is that?

However, things changed when a friend of mine introduced me to Mongolian beef. She orders it everywhere and raves about how yummy it is. So when having lunch at a local Chinese spot one day, I took a taste for myself. It was so yummy and tender with a hint of sweetness and no spice. Right up my alley!

During this extra time at home, I’ve been using it to cook up new things. I rarely cook beef at home and even more rarely cook Chinese food. Time to switch things up, people!

So for today’s recipe, I am sharing my recipe for Mongolian beef – made with no fancy ingredients at all!

Pot of Mongolian Beef with onions and pepper strips
Closeup view of a plate of Mongolian Beef
Mongolian Beef cooked with peppers and onions

What is Mongolian beef?

This is a tricky thing to answer…I couldn’t find an exact definition about what ingredients go in to Mongolian beef aside from these basics:

  • Thinly slices beef
  • Sliced onions
  • Sweet sauce
  • Not spicy

Because this beef is so basic, you’ll find various recipes, some using fancy Chinese ingredients like fish sauce and hoisin sauce. But there’s no need for all that. All you need is soy sauce, brown sugar, and some spices to achieve a yummy sauce that accompanies this beef perfectly.

How is this recipe made?

This beef is made in a few main steps: cook the veggies, cook the beef, and cook the sauce. Each of these take different amounts of time and heat so we cook them separately and then toss them together at the end.

Veggies

We start with the veggies to lay down the base flavor in the pan. The white onion and peppers are cooked for a couple minutes to soften them and flavor the oil before we cook the meat. The veggies are removed and set aside.

Beef

Next comes the beef. It’s tossed in cornstarch before we add it to a very hot pan with oil. The cornstarch will create a slightly crispy exterior and help thicken the sauce later on. For this step, you’re only going to cook it enough to sear the outside and then remove it from the pan. It’ll cook more when we add it to the sauce.

Sauce

This sauce is one of the simplest you’ll ever make, especially for a Chinese dish. It’s made with soy sauce, water, ground ginger, minced garlic, and brown sugar. I add in a little Sriracha to give it a little zing of flavor but you don’t have to.

The sauce cooks together for a minute before we add the beef in to finish cooking for another minute. Finally the veggies are added back and toss in the sauce with the beef. And that’s all there is to it!

I serve my beef over rice, but you can also serve over noodles, if you prefer.

Bowl of Mongolian Beef with peppers and onions topped with sesame seeds
Mongolian Beef on a bed of white rice

Tips & Tricks

  1. The beef will thicken the sauce so if you want it more on the runny side, don’t let the sauce thicken too much before the beef is added to it.
  2. It’s important to cook the veggies and beef on high to get them to cook fast but still stay tender. But to make sure they don’t burn, stir them constantly.
Print Recipe

Mongolian Beef

Tender strips of beef and vegetables are cooked in a sweet and savory soy sauce and served over a bed of rice or lo mein noodles.
Prep Time15 minutes mins
Cook Time15 minutes mins
Total Time30 minutes mins
Servings: 4 servings

Ingredients

  • 1 lb thinly cut steak cut into strips
  • ¼ cup cornstarch
  • ¼ cup canola oil
  • 2 bell peppers sliced into strips
  • 1 medium white onion sliced into strips
For the sauce:
  • ¼ cup low-sodium soy sauce
  • ¼ cup water
  • 2 cloves garlic minced
  • 1 teaspoon ground ginger
  • ¼ cup brown sugar
  • 1 teaspoon Sriracha sauce (optional)
  • 4 stalks green onion
  • salt and pepper for seasoning

Instructions

  • Add the beef strips to a large storage bag. Add the cornstarch. Seal the bag, removing all air and shake to coat the beef in the cornstarch. Set aside.
  • Place 2 tablespoons of canola oil in a large skillet and set over high heat. Once the oil is hot, add the pepper and onion to the pan. Toss occasionally to help them cook evenly. Once you see the veggies start to char a little, remove from the pan and place in a bowl to set aside, leaving oil in the pan. Return pan to heat and add remaining tablespoons of oil.
  • Once oil is hot, add beef and sear for about 1 minute per side. Remove from pan and place in a separate bowl from the veggies. If there is excess fat or oil in the pan, drain it out.
  • Place pan back on stove and heat to medium-high. Add soy sauce and water to pan. The pan should sizzle and the burnt beef pieces should loosen up from the pan. Use a spoon to help them out. Add in the brown sugar, minced garlic cloves, and ground ginger to the sauce and stir together. Bring it to a boil, then reduce to medium heat.
  • Add in the Sriracha and the beef to the sauce. Cook for 1 minute or until the sauce thickens slightly. Add the veggies back in and toss them in the sauce. Cook for 1 minute to heat them up and then remove from heat.
  • Serve beef over white steamed rice or lo mein noodles.

Pin for later:

Mongolian Beef photo collage

More recipes you’ll love:

Easy Thai Chicken Curry
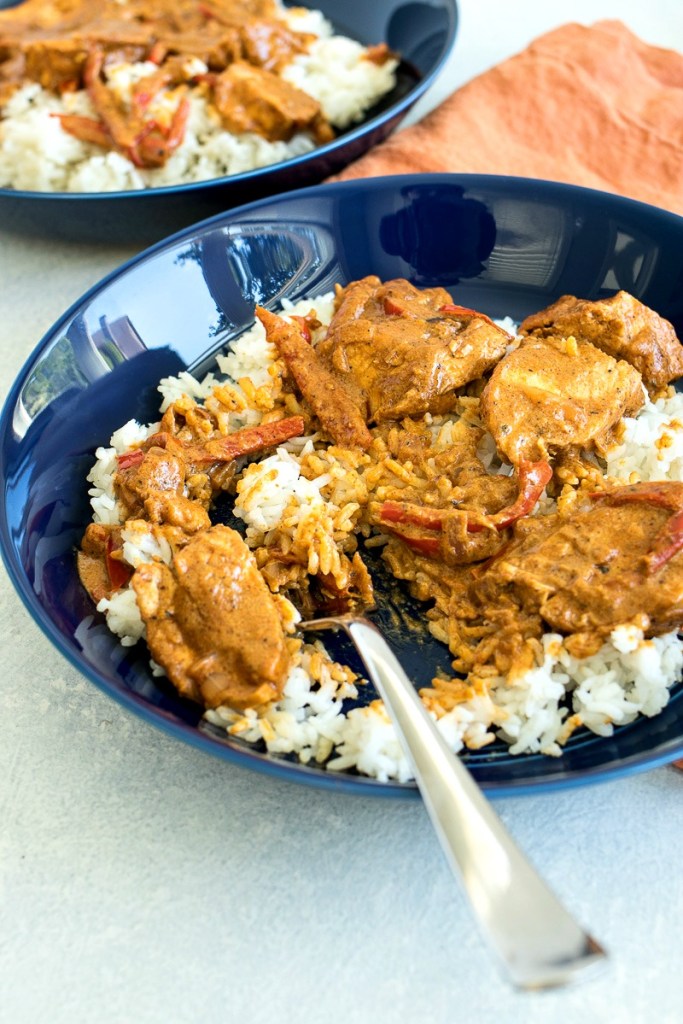
Plate of Thai Chicken Curry on white rice
Orange Chicken
Plate of fired tempura chicken in an orange sauce with broccoli florets
Asian Steak Skewers
 Tender sirloin marinated in Asian flavors and skewered with red onion and red pepper

Share this:

  • Click to share on Pinterest (Opens in new window)
  • Click to share on Facebook (Opens in new window)
  • Click to share on Twitter (Opens in new window)
  • Click to share on Tumblr (Opens in new window)
  • Click to email this to a friend (Opens in new window)

22 Comments

« Crispy S’mores Bars
Easy Berry Smoothie »

Comments

  1. Jo says

    May 25, 2020 at 10:37 am

    That sauce looks and sounds amazing, with some amazing flavors! I’m guessing this would be great with noodles too as much as it’s with rice. Delicious!

    Reply
  2. Natalie says

    May 25, 2020 at 9:23 am

    This is great dinner option. So easy to make and yet so delicious and healthy. I will definitely put this on my to try list. Can’t wait to make this.

    Reply
  3. Alena says

    May 25, 2020 at 8:02 am

    That sauce just sounds so so good and filled with so much flavor! This is just like a restaurant meal (but so much better!).

    Reply
  4. Heidy McCallum says

    May 25, 2020 at 7:47 am

    This Mongolian Beef really did come out very tender and super tasty! I loved the flavor and the kids even ate it without complaint. I felt like a winner last night after dinner! Great recipe and we will save it to make another day!

    Reply
  5. Sara says

    May 25, 2020 at 12:43 am

    This is absolutely delicious and perfect for weeknight dinners in our household. We eat steak quite a bit, and our freezer is stocked with it. Thanks for giving us a new, creative way to use it!

    Reply
  6. Charity says

    May 24, 2020 at 9:48 pm

    OMG I’m drooling! I love Mongolian beef but have only had it in authentic Chinatown restaurants. I had no clue how easy it is to make at home. Excited to try it!

    Reply
  7. Jen says

    May 24, 2020 at 1:15 pm

    I love Mongolian beef but can’t order it out because of gluten. So nice to be able to sub GF soy sauce and make a restaurant-quality recipe at home!

    Reply
  8. Loreto and Nicoletta Nardelli says

    May 24, 2020 at 9:07 am

    This Mongolian beef looks so good! Onions and peppers are a great touch and that simple sauce sounds delicious!

    Reply
  9. Anna says

    May 24, 2020 at 4:39 am

    Thank you so much for this delicious recipe! Me and my partner cooked it couple of nights ago for dinner, and it was such a hit! That sauce is just heavenly, so much flavour! We served ours with some noodles and cold beer on side, it was utterly delicious!

    Reply
  10. Paige says

    May 22, 2020 at 8:16 pm

    YUM…this was SO good, and the favors were amazing!

    Reply
  11. Elaine says

    May 22, 2020 at 8:07 am

    I don’t think I remember when was the last time I made anything similar. Fantastic recipe that looks easy to follow and just the way it should be. And the soy sauce over rice is a fabulous combo!

    Reply
  12. Ashley J Newton says

    May 20, 2020 at 9:58 pm

    This sounds freaking awesome. Adding to my meal list!

    Reply
  13. Bella says

    May 19, 2020 at 6:04 pm

    YUMM this looks so tasty!!! I will have try making this gluten free!!! thanks for sharing this recipe.

    Reply
  14. Maria says

    May 19, 2020 at 11:23 am

    this looks so yum! I am going to have to add it to our dinner options.

    Reply
  15. Patricia @ Grab a Plate says

    May 18, 2020 at 11:03 pm

    Okay, I just finished dinner, abut I’m drooling over this dish! I love it! I’m going to pass it on to my hubs to make for dinner soooooon!

    Reply
  16. Dolly @ Thrifty in the Kitchen says

    May 18, 2020 at 4:37 pm

    This looks so sticky and delicious! Love those bell peppers adding color and I can just imagine how yummy this is served over rice. Want, want, want!

    Reply
  17. Alison says

    May 18, 2020 at 4:28 pm

    Well this is majorly delish! Love the simple ingredients with mega flavor!

    Reply
  18. Cathleen @ A Taste of Madness says

    May 18, 2020 at 4:23 pm

    I love the sound of this!! Once I find steak in stores, I am definitely giving this a go. Thanks for the recipe!!

    Reply
  19. Beth Pierce says

    May 18, 2020 at 3:58 pm

    Oh my goodness! My mouth is watering! This looks so delicious and tasty. I can’t wait to make this!

    Reply
  20. Adrianne says

    May 18, 2020 at 3:50 pm

    I am so hungry looking at this recipe. Yum, it looks so tasty and perfect for a meal you can cook at home and stay in for. Can’t wait to try it. Thanks for sharing.

    Reply
  21. Mimi says

    May 18, 2020 at 12:32 pm

    I actually have all the ingredients so I’ll try and make it tonight for dinner, it looks delicious

    Reply
  22. Marta says

    May 18, 2020 at 11:33 am

    There’s a nice Mongolian BBQ joint within walking distance to our house. I’d love to be able to recreate their beef, and yours looks like it will accomplish my goal.

    Reply

Leave a Reply Cancel reply

Your email address will not be published. Required fields are marked *

This site uses Akismet to reduce spam. Learn how your comment data is processed.

Hi, my name is Sharon. I’m an accountant by day, risk-taking baker and food enthusiast by night. Come join me as I share my favorite recipes and test out new ones along the way!

fall flavors

a stack of Pumpkin Chocolate Chip Cookies and individual cookies on a sheet pan with chocolate chips around them and a stack of pumpkins in the background, shot from a side angle

Pumpkin Chocolate Chip Cookies

zoomed in shot of Sage & Browned Butter Hasselback Sweet Potatoes, shot from a side angle

Sage & Browned Butter Hasselback Sweet Potatoes

closeup of mini pumpkin doughnut muffins with one with a bite out of it

Mini Pumpkin Doughnut Muffins

close up of potato dinner rolls on a wooden round serving platter

Potato Dinner Rolls

front shot of sweet potato cornbread in a cast iron skillet

Sweet Potato Cornbread

side shot of banana bread doughnuts on a purple plate with more doughnuts in the background

Banana Bread Doughnuts

ORDER MY NEW COOKBOOK NOW!

photo of entertaining made easy cookbook available for preorder now

Breakfast
Appetizers
Entrees
Salads
Sides
Drinks
Desserts
Roundups
Holidays

Browse by Date

  • Home
  • About Me
  • Contact Me
  • Privacy Policy

holiday favorite

berry pavlova sitting on a baking sheet with parchment paper

Berry Pavlova

a glass dish with bacon corn casserole with half scooped out and a wooden spoon in it, shot from a side angle

Bacon Corn Casserole

staged shot of pumpkin cinnamon crunch muffins with sprinkled pecans and pumpkins in the background, shot from a side angle

Pumpkin Cinnamon Crunch Muffins

front shot of sweet potato cornbread in a cast iron skillet

Sweet Potato Cornbread

overhead zoomed in shot of cranberry cookies with white chocolate drizzle

Cranberry Cookies with White Chocolate Drizzle


Peach Raspberry Cobbler – fresh peaches and rasp Peach Raspberry Cobbler – fresh peaches and raspberries topped with a cakey, cinnamon-sugar crust that's so incredible you won't even need ice cream!

Cobblers have stolen my heart, you guys! The first cobbler I ever loved was blackberry, but after tasting this peach raspberry version at a work potluck, it took the top spot! 

The secret? That cinnamon sugar crust! It's not just a topping – it's the STAR of the show! The combination of fresh peaches, tart raspberries, and that cakey, cinnamon-sugar-coated crust is pure summer magic!

Pro tip: Let the cobbler cool for at least 15 minutes before serving so the filling can thicken up and it'll be much easier to scoop!

Perfect for summer gatherings, July 4th parties, potlucks, or anytime you want a Southern dessert with a delicious twist! 

💬 Comment "COBBLER" for the recipe
💾 SAVE for summer entertaining
📤 SHARE with someone who loves fruit desserts!

https://www.certifiedpastryaficionado.com/peach-raspberry-cobbler/
Nutella Macarons – delicate French almond cookie Nutella Macarons – delicate French almond cookies filled with chocolate-hazelnut Nutella spread! Classic macarons made with the proper technique learned straight from a pastry chef! 

You guys remember when I made French macarons for the first time and they were a HOT MESS? The tops were cracked and bumpy and looked more like brownies! I was determined to get them right, so I took a macaron baking class in person – and it changed EVERYTHING! 

The trickiest part? Mixing the dry and wet ingredients together. Under mix = too dry and cracked. Over mix = dense and heavy. But now I know exactly what the batter should look like!

Pro tip: Age your egg whites for 24-48 hours before making the meringue – this helps them get to the perfect consistency!

Perfect for Valentine's Day, gift-giving, special occasions, or anytime you want elegant French macarons at home! 🇫🇷

💬 Comment "NUTELLAMACARON" for the recipe
💾 SAVE for French cookie inspiration
📤 SHARE with someone who loves macarons!

https://www.certifiedpastryaficionado.com/nutella-macarons/
Classic Pot Roast – chuck roast slowly cooked in Classic Pot Roast – chuck roast slowly cooked in a jus made of beef broth, carrots, celery, and onions! Balsamic vinegar, thyme, and mustard give that jus a kick of flavor! 

Cold weather is in full effect, you guys! So comfort food needs to be on the menu! My husband wanted to try a good pot roast, so I used a combination of recipes to come up with the perfect one! 

The secret? Traditional aromatics (carrots, celery, onions) PLUS balsamic vinegar and Dijon mustard set this roast apart with a tangy kick!

Pro tip: Sear the roast first to give it beautiful color on the outside – if you skip this step, the meat will look almost gray when cooked in the broth!

💬 Comment "POTROAST" for the recipe
💾 SAVE for comfort meals
📤 SHARE with someone who loves pot roast!

https://www.certifiedpastryaficionado.com/classic-pot-roast/
Sweet Potato Gnocchi with Sage Browned Butter – Sweet Potato Gnocchi with Sage Browned Butter – fluffy pillows of sweet potato dumplings tossed in a sage and browned butter sauce for a comforting pasta dish you didn't know you needed! 

This gnocchi was inspired by a dish I had at a local restaurant years ago, you guys! I was skeptical about sweet potato gnocchi with just butter and sage – no cream? no tomato? But MAN, was I wrong! 

The sweet potato gnocchi is even MORE flavorful than the original! It shines on its own with little help from a heavy sauce – that's why it pairs so perfectly with a light toss in sage and browned butter!

Pro tip: Use a potato ricer to break up the sweet potatoes – don't use a food processor or it will make the gnocchi gummy and pasty! The ricer makes it super fluffy!

Perfect for fall dinners, Thanksgiving, date nights, or anytime you want restaurant-quality comfort food at home! 

💬 Comment "GNOCCHI" for the recipe
💾 SAVE for fall cooking
📤 SHARE with someone who loves pasta!

https://www.certifiedpastryaficionado.com/sweet-potato-gnocchi-with-sage-browned-butter/
Sour Cream Doughnuts – dense and crispy on the o Sour Cream Doughnuts – dense and crispy on the outside, moist and cakey on the inside! Your favorite old-fashioned cake doughnuts ready in half the time as yeast doughnuts!

These are also known as old-fashioned doughnuts, you guys! They're bulky, firm on the outside, but oh-so-moist on the inside! The BEST combination of textures – crunchy yet chewy, dense yet moist! 

I fell in love with these at a local bakery, and now my husband surprises me with them from time to time! Do I have a great man or what?!

Pro tip: Don't roll the dough too thin or the doughnuts will turn to hockey pucks when you fry them! You're better off making the dough too thick than too thin!

Perfect for weekend breakfast, Easter morning, brunch, or anytime you want homemade doughnuts without the wait! 

💬 Comment "DOUGHNUTS" for the recipe
💾 SAVE for weekend baking
📤 SHARE with someone who loves doughnuts!

https://www.certifiedpastryaficionado.com/sour-cream-doughnuts

Copyright © 2026 Certified Pastry Aficionado · Web Design by Viva la Violet

loading Cancel
Post was not sent - check your email addresses!
Email check failed, please try again
Sorry, your blog cannot share posts by email.