• Facebook
  • Instagram
  • Pinterest
  • RSS
  • Twitter
  • Home
  • About Me
  • Recipes
  • Cookbooks
  • Work With Me
  • Contact

CPA: Certified Pastry Aficionado

Lemon Blueberry Frozen Yogurt

ice cream· National Ice Cream Month· Summertime Favorites
July 22, 2019

Jump to Recipe Print Recipe

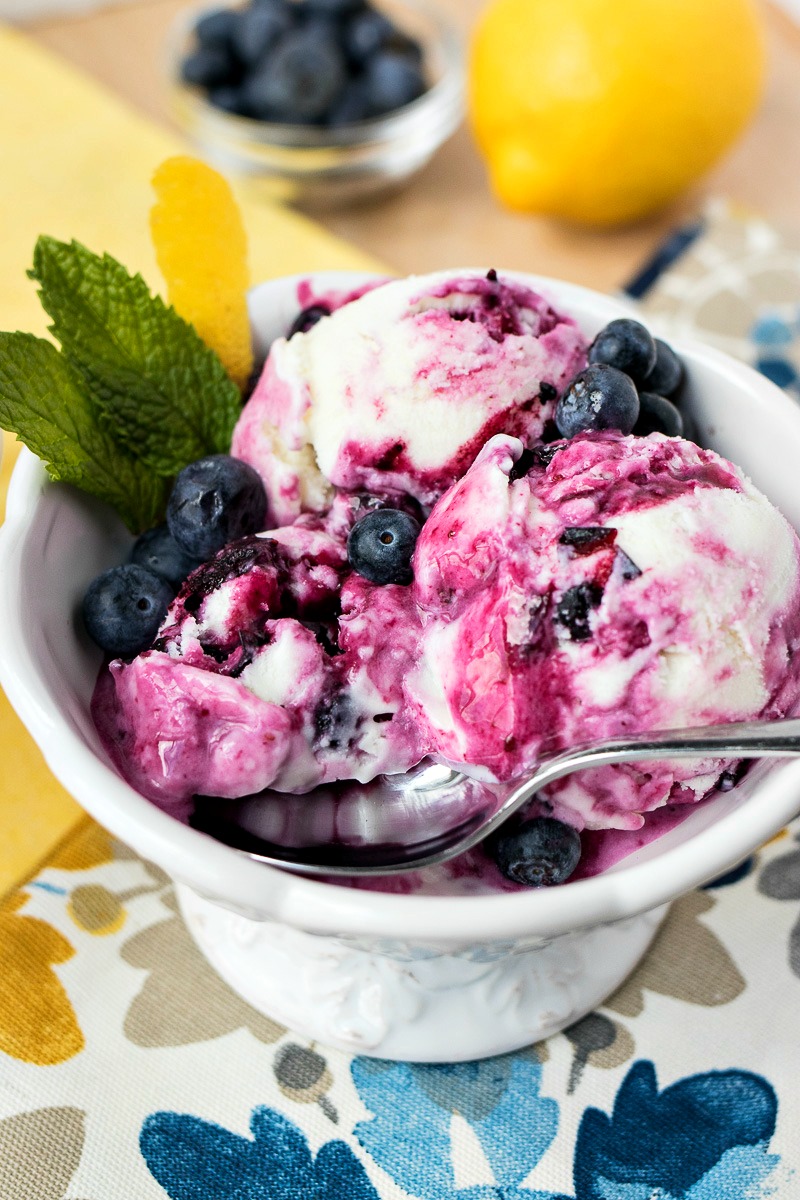
Lemon Blueberry Frozen Yogurt – Homemade frozen yogurt with a hint of lemon and swirls of blueberry sauce

Bowl of Lemon Blueberry Frozen Yogurt with whole blueberries

Rarely has a frozen yogurt captured my attention. Frozen yogurt is what I would eat if I wanted ice cream’s healthier cousin. It is most often the choice I have to make, not the one I want to make.

So you can imagine my surprise when I tried a frozen yogurt at an ice cream shop for the first time in years and found my taste buds FLOORED. Not only because it was frozen yogurt, but because it was a lemon blueberry frozen yogurt. If frozen yogurt was going to change my life, I thought it would at least be vanilla or chocolate or some kind, right??

But no, it was a fruity frozen yogurt that caught me off guard. Who would have guessed that? Least of all, me!

That is why I had to attempt to recreate it here to share it with you all. And I have to say…it tastes just like the inspiration from which it was adapted!!

Without further ado, check out my Lemon Blueberry Frozen Yogurt!

Pan of Lemon Blueberry Frozen Yogurt Bowl of Lemon Blueberry Frozen Yogurt with blueberries and a lemon garnishCloseup of a spoonful of Lemon Blueberry Frozen Yogurt

How this recipe is made

Frozen yogurt is virtually made with the same process as ice cream. The only major difference is the yogurt. Let’s talk through exactly what that process looks like.

Ingredients

The base for this frozen treat is the yogurt. Yogurt has more water than necessary for a frozen treat so we need to strain out as much as possible. This will make the frozen yogurt super creamy. You’ll do this by sitting the yogurt in a cheesecloth over a mesh strainer and letting it sit for at least 6 hours.

The flavor of the base comes from lemon syrup made from lemon juice and sugar, plus a little lemon peel that is boiled with milk that will be added to the yogurt. It’s just enough lemon to get a little tartness but not enough to make you pucker up. I love how subtle the flavor is!

Bowl of lemon peels

After the frozen yogurt is frozen, it gets layered with a homemade blueberry sauce. We don’t mix in the blueberry sauce while freezing the base because you won’t get pretty swirls this way. Instead, the blueberries will completely mix into the lemon frozen yogurt base and you won’t get any visual separation of the flavors.

a glass dish of lemon blueberry frozen yogurt, shot from a side angle
Process

The process for making frozen yogurt involves straining the yogurt (as mentioned above), cooking the milk with cornstarch to thicken it up, making the lemon syrup, combining all of these, and then chilling before freezing in your ice cream machine. It’s important to chill the base before freezing because hot or warm liquid will not freeze. It’s too much of a temperature differential for the ice cream machine to overcome.

While the frozen yogurt base chills, the blueberry sauce is made. This process involves boiling sugar and blueberries until the berries burst and the sauce thickens. It’s important for the berries to burst so the juice from the berries thickens the sauce. Plus, you don’t want all that juice to stay in the berries because it will cause them to turn rock-solid when the finished yogurt freezes.

Finally the yogurt is frozen for about 15 minutes until the texture is thick. To finish off the frozen yogurt, it’s layered with the berry sauce and then frozen for another 4 hours to firm up before serving.

Tips & Tricks

Here are a few helpful tips to ensure you get this recipe exactly right:

  1. Make sure you use softened cream cheese for this recipe or else you will find it impossible to mix well into the rest of the yogurt base.
  2. When peeling the lemon peel, make sure you do not peel off the white pith or membrane of the lemon. It is very bitter and will not add a good flavor to the frozen yogurt.
  3. Fresh lemon juice is essential to this frozen yogurt. Do not purchase lemon juice from concentrate or you can risk the flavor of your frozen yogurt being all wrong.

Bowl of Lemon Blueberry Frozen Yogurt Spoonful of Lemon Blueberry Frozen Yogurt and blueberries

Print Recipe

Lemon Blueberry Frozen Yogurt

Homemade frozen yogurt with a hint of lemon and swirls of blueberry syrup
Prep Time30 minutes mins
Cook Time20 minutes mins
Resting time16 hours hrs
Total Time40 minutes mins
Servings: 1 quart

Ingredients

For the lemon yogurt base:
  • 1 quart low-fat plain yogurt
  • 2 lemons
  • 2/3 cup + 1/4 cup sugar divided
  • 1 1/2 cups whole milk
  • 2 tablespoons cornstarch
  • 2/3 cup heavy cream
  • 1/3 cup light corn syrup
  • 2 ounces cream cheese
For the blueberry sauce:
  • 1 1/2 cup blueberries
  • 3/4 cup sugar

Instructions

  • Prepare the yogurt by straining out the extra liquid. To do this, place a mesh strainer over a bowl and line with two layers of cheese cloth. Add yogurt and let it sit in the refrigerator for 6 to 8 hours. Once the liquid is strained out, measure out 1 1/4 cups of yogurt and set aside. 
  • Using a vegetable peeler, remove the outer skin of the lemon, being careful not to remove the white pith. Set aside. Juice the lemons to obtain 1/2 cup lemon juice. Add juice and 1/4 cup of sugar to a small sauce pan. Place over medium-high heat to dissolve the sugar. Once sugar is dissolved, remove from heat and let it cool. 
  • In a small bowl, whisk together 2 tablespoons milk and cornstarch to make a slurry. Set aside. Grab a large bowl and fill it with 2 cups of ice and 1 cup of water. Nest another bowl into that bowl so that it's sitting on the ice water. Place a strainer on top of the inner bowl. Set this setup aside.
  • In a medium saucepan, add remaining milk, cream, 2/3 cup sugar, corn syrup, and lemon peel. Bring to a boil over medium-high heat. Cook for 4 minutes then add in slurry. Continue cooking for 2 minutes or until thickened. Remove from heat.
  • In a small bowl, add softened cream cheese and whisk to smooth it out. Add lemon syrup and yogurt and whisk together until smooth. Add about 1/4 cup of heated milk mixture and whisk together until smooth. Add mixture back to rest of milk. 
  • Pour mixture through mesh sieve into chilled bowl. Stir to cool down the mixture. Place plastic wrap on top of milk mixture to prevent film from forming on top. Chill in refrigerator until really cold, at least 4 hours. 
  • While the mixture is chilling, make the blueberry sauce. Mix the blueberries and sugar in small sauce pan and place over medium heat. Bring to a boil and then reduce heat to a simmer. Stir occasionally and continue to cook until blueberries have burst and mixture has thickened. Set aside to cool. 
  • Once the lemon yogurt base has chilled, it's time to freeze it. Freeze yogurt according to your ice cream maker's instructions (mine took about 15 minutes to freeze).
  • When the frozen yogurt is finished, spread half of it into rectangular glass container with a lid. Spoon in blueberry sauce and lay in dollops but do not mix. Repeat layer one more time and then spread top of the ice cream into one flat layer. Place plastic wrap directly on top of the frozen yogurt and then cover with the lid. Freeze until firm, about 4 hours.

Notes

Adapted from Jeni's Splendid Ice Creams

Pin for later:

Lemon Blueberry Frozen Yogurt photo collage

More treats you’ll love:

Raspberry Lemon Sorbet

Hollowed lemon full of Raspberry Lemon Sorbet

Lemon Blueberry Ricotta Pancakes

Stack of Lemon Blueberry Ricotta Pancakes with blueberry syrup

Lemon Poppyseed Scones

Lemon Poppyseed Scone iced and topped with a lemon slice

Share this:

  • Click to share on Pinterest (Opens in new window)
  • Click to share on Facebook (Opens in new window)
  • Click to share on Twitter (Opens in new window)
  • Click to share on Tumblr (Opens in new window)
  • Click to email this to a friend (Opens in new window)

25 Comments

« S’mores Sundae
Chocolate Covered Strawberry Sundae »

Comments

  1. Andrea Johnson says

    May 11, 2020 at 1:51 pm

    What do you do with the left over yogurt? Is it supposed to be added into the base somewhere? Thanks and can’t wait to try it!

    Reply
    • Sharon says

      May 12, 2020 at 2:37 pm

      Sorry, I should have explained better in the recipe. You only need 1 1/4 cup of strained yogurt for the recipe. The reason I say one quart in the recipe is because that is the measurement before you strain it. It’s hard to say how much you’ll need exactly before it’s strained so we say 1 quart just to be safe. You can use the leftover strained yogurt for whatever you want! I like using it for tzaziki sauce or a chicken salad.

      Reply
  2. Natalie says

    July 29, 2019 at 9:09 am

    The flavors are amazing. and recipe is super easy to make. I wonder why I never made frozen yogurt before. Now you convince me to try. My kiddo will love this!

    Reply
  3. Jagruti Dhanecha says

    July 29, 2019 at 3:03 am

    Lemon and blueberry a great combo in frozen yogurt. Refreshing and absolutely delicious.

    Reply
  4. Amanda Mason says

    July 28, 2019 at 11:26 pm

    Ok yum!! This looks so delish!! I’ve never madea homemade yogurt quite like this before! I love lemon and blueberries and this looks like the perfect summer sweet treat!!

    Reply
  5. Amy says

    July 28, 2019 at 8:37 pm

    Lemon + blueberries are the perfect combo! I love how this is a healthier treat too! This looks amazing and I can’t wait to try.

    Reply
  6. Monica says

    July 28, 2019 at 7:15 pm

    This looks incredible – I love the lemon blueberry flavor combination, and the blueberry swirls in this look absolutely to die for! Frozen yogurt is such a treat like this. 🙂

    Reply
  7. Anna says

    July 28, 2019 at 1:06 pm

    This looks incredible! The texture of that frozen yogurt looks so heavenly, I can almost taste it! Looking forward to trying this recipe next weekend, would be just perfect to cool down with on a hot day!

    Reply
  8. Cathleen @ A Taste of Madness says

    July 27, 2019 at 6:35 pm

    Hhaha. I have tried making frozen yogurt with unsoftened cream cheese and it really doesn’t work. So good tip 🙂
    This looks perfect for the summer!!

    Reply
  9. Mama Maggie's Kitchen says

    July 25, 2019 at 5:23 pm

    Oh my! I need this in my life. Blueberries are my favorite. Must print your recipe. Thanks for sharing.

    Reply
  10. Michelle says

    July 24, 2019 at 1:43 pm

    Oh wow! What a delicious summer treat this frozen yogurt is. What great tips for how to make frozen yogurt at home. I’m giving this a try. I love blueberries and lemon together.

    Reply
  11. kylee says

    July 24, 2019 at 10:48 am

    Frozen yogurt is my secret weapon with my kids – they think it’s “ice cream” and I’m happy for them to eat as much as they’d like! They’d devour this, can’t wait to make it for them!

    Reply
  12. Anne Lawton says

    July 24, 2019 at 7:43 am

    This combination of flavors is a perfect match. I love frozen yogurt, one of my favorite summer treats!

    Reply
  13. Michelle says

    July 24, 2019 at 4:18 am

    I love frozen yoghurt but have never made it at home. I’m definitely going to make this one though, it looks delicious!

    Reply
  14. Emese says

    July 23, 2019 at 8:44 pm

    I have never made frozen yoghurt at home before but how you explain it I will definitely give it a try. Love everything with lemon and blueberry.

    Reply
  15. Kristine says

    July 23, 2019 at 5:48 pm

    This frozen yogurt was A-MAZING! So flavorful and tasty. My kids ate it up, not even complaining that it wasn’t ice cream. So good, thank you!

    Reply
  16. Raia says

    July 23, 2019 at 4:34 pm

    I love frozen yogurt, and making it from home is so fun! What a delicious recipe with the blueberry and lemon combo!

    Reply
  17. cheflolaskitchen says

    July 23, 2019 at 4:30 pm

    Love frozen yogurt! This looks amazing!

    Reply
  18. Beth Pierce says

    July 23, 2019 at 3:42 pm

    What a cool and refreshing treat for summer! Just what I needed after a long and hot day!

    Reply
  19. Marisa Hernandez says

    July 23, 2019 at 3:41 pm

    This sounds so delicious !!! Perfect for Summer… Definitely pinning for later!

    Reply
  20. Shani | Sunshine & Munchkins says

    July 23, 2019 at 12:56 pm

    I’ve never made homemade frozen yogurt but this looks amazing!

    Reply
  21. Rachel says

    July 23, 2019 at 11:25 am

    Oh lover! You have put all of my favorite flavors into one thing. I can’t wait to make this.

    Reply
  22. Valerie says

    July 22, 2019 at 6:43 pm

    That lemon blueberry frozen yogurt looks and sounds terrific! It’s been so hot here, this would be great to have on hand.

    Reply
  23. Sarah Althouse says

    July 22, 2019 at 1:22 pm

    I love this combination and keep thinking I Have to try it myself!

    Reply

Trackbacks

  1. Yummy And Healthy Frozen Yogurt | Donnadonella says:
    February 17, 2020 at 9:25 pm

    […] Lemon Blueberry Frozen Yogurt […]

    Reply

Leave a Reply Cancel reply

Your email address will not be published. Required fields are marked *

This site uses Akismet to reduce spam. Learn how your comment data is processed.

Hi, my name is Sharon. I’m an accountant by day, risk-taking baker and food enthusiast by night. Come join me as I share my favorite recipes and test out new ones along the way!

fall flavors

close up of pretzel bread pudding slice on a plate in a pool of whiskey sauce

Pretzel Bread Pudding

zoomed in shot of a bowl of sweet potato gnocchi, shot from a side angle

Sweet Potato Gnocchi with Sage Browned Butter

picture of apple pecan farro salad served on a white plate

Apple Pecan Farro Salad

close up of sliced loaf of chocolate cinnamon babka with the center exposed to see the beautiful swirl of chocolate

Chocolate Cinnamon Babka

styled shot of Sparkling Apple Cider Sangria

Sparkling Apple Cider Sangria

Pecan Pie Brownies

ORDER MY NEW COOKBOOK NOW!

photo of entertaining made easy cookbook available for preorder now

Breakfast
Appetizers
Entrees
Salads
Sides
Drinks
Desserts
Roundups
Holidays

Browse by Date

  • Home
  • About Me
  • Contact Me
  • Privacy Policy

holiday favorite

zoomed in shot of sour cream doughnuts and donut holes on a cloth napkin, shot from a side angle

Sour Cream Doughnuts

picture of mixed berry almond tart dusted with powdered sugar shot at an angle from the front

Mixed Berry Almond Tart

a corner shot of a plate of Raspberry Almond Linzer Cookies with a shaker of powdered sugar in the background, shot from a side angle

Raspberry Almond Linzer Cookies

stacked maple walnut cookies on a red orange napkin and one cookie with a bite removed

Maple Walnut Cookies

apple cinnamon monkey bread with a chunk out of it and sliced apples in front, shot from a side angle

Apple Cinnamon Monkey Bread


Do you remember those Danish butter cookies that c Do you remember those Danish butter cookies that came in the fancy blue tin? The ones your mom would buy every Christmas and you'd go absolutely CRAZY for? 

Well, guess what? You can make them YOURSELF! And they're shockingly simple!

I'm talking about those perfectly crispy-on-the-outside, melt-in-your-mouth-on-the-inside shortbread cookies that are basically edible butter. And honestly? 

I don't think they should be reserved just for the holidays. These cookies deserve to be eaten ALL YEAR LONG!

Here's what makes them so special:
-The Recipe: Only FIVE ingredients—butter, flour, sugar, eggs, and vanilla. That's it! If you can cream butter and sugar together, you can make these.
-The Texture: They're like shortbread cookies but slightly softer, so when you bite into them, they literally melt in your mouth. It's pure butter heaven.
-The Secret: Use European-style butter! It has a higher fat content which makes these cookies extra creamy and flavorful. It's worth the upgrade, I promise!

Important tips:
Be VERY careful measuring your flour—too much and the dough will be impossible to pipe
Use a LARGE star tip (not a small one!) or you won't be able to squeeze the dough out
These actually taste BETTER after they cool! The crispiness is what makes them so good, so resist eating them warm (I know it's hard!)

These are perfect for coffee breaks, gift-giving, parties, or honestly just because you deserve a good cookie. You can make them in under an hour from start to finish!

Want the full recipe? 💌 Comment 'BUTTER' below and I'll send you the link!

#DanishButterCookies #ButterCookies #ShortbreadCookies #HolidayBaking #CookieRecipe #HomemadeCookies
After making approximately ONE MILLION pumpkin tre After making approximately ONE MILLION pumpkin treats recently, I was desperate for something with all those cozy fall vibes but maybe... a little less pumpkin? 

So I set my sights on something that doesn't get nearly enough love in the dessert world: SWEET POTATOES! 

And here's my controversial opinion: Sweet potato beats pumpkin ANY DAY OF THE WEEK. There, I said it! 

These Sweet Potato Cupcakes are super moist, perfectly spiced, and topped with the creamiest cinnamon cream cheese frosting. 

They taste similar to pumpkin cupcakes (so if you're a die-hard pumpkin lover, you can absolutely swap in pumpkin puree!), but here's why sweet potato wins:
✨ More starch = MORE moisture and density in the cupcake
✨ The flavor is 100x better (fight me on this!)
✨ That perfect balance between sweet and earthy

But what I'm MOST proud of is how the frosting and cake work together. You know how sometimes you get a cupcake with frosting that's way too sweet so you just eat the cake? Or killer frosting but blah cake so you only eat the frosting? NOT THIS CUPCAKE. 

The spiced cake needs a little sweetness to balance it out, and the tart cream cheese frosting is PERFECT. They're soulmates! 

Important tips:
-Don't undercook them or they'll sink in the center (but more frosting fixes everything!)
-Fill the liners 3/4 full—not all the way—to get exactly 12 cupcakes
-Use a 2M Wilton tip for that fancy frosting swirl (or just spread with a knife!)

Want the full recipe? 💌 Comment 'CUPCAKE' below and I'll send you the link!
Team Sweet Potato or Team Pumpkin? Let me know in the comments! 

#SweetPotatoCupcakes #CreamCheeseFrosting  #CupcakeRecipe
Y'all, I need to talk about these Kentucky Derby C Y'all, I need to talk about these Kentucky Derby Cookie Bars because they might just be the most decadent thing I've ever created!

So here's the deal: I love taking traditional recipes and giving them a major upgrade. 

Traditional Derby Pie is delicious, but I wanted to make something even MORE special. And these bars? They're Derby Pie on steroids!

Here's what makes them absolutely incredible:
The Cookie Crust: Instead of regular pie crust, we're using a thick chocolate chip cookie base. Game. Changer.
The Filling: Loaded with pecans, chocolate chips, and a hint of bourbon that adds this rich, complex flavor. The filling is more dense and cakey than traditional Derby Pie, which gives you the perfect chewy texture.
The Bourbon Caramel: This homemade bourbon caramel sauce is what takes these bars over the top. It's sweet, buttery, and has that gorgeous bourbon depth. And yes, the alcohol cooks out, so it's safe for everyone (even made these while I was pregnant!)!

Important tips:
Don't chop your pecans too finely—leave nice chunks for better texture
If the bars start browning too quickly, just cover them with foil while the center finishes baking
Don't over-thicken the caramel sauce on the stove—it will thicken as it cools!

These bars are perfect for Derby Day (obviously!), but honestly, they're amazing for any summer gathering, BBQ, or potluck. 

Want the full recipe with that bourbon caramel sauce? 💌 Comment 'DERBY' below and I'll send you the link!

#DerbyPie #CookieBars #BourbonDesserts #PecanDesserts
Y'all, I just made the BEST hot chocolate of my li Y'all, I just made the BEST hot chocolate of my life and I need you to try it immediately!

Growing up, I only knew hot chocolate from those packets where you just add hot water. I had NO idea you could make it from scratch so easily! 

All it takes is hot milk, cocoa powder, chocolate chips, and the secret ingredient... PEANUT BUTTER!

I've always been obsessed with the peanut butter and chocolate combo (if you've been following me, you know this is true!), but for some reason, it never occurred to me to add it to hot chocolate until recently. And now I'm officially never going back to regular hot chocolate!

What makes this recipe so special? The peanut butter adds this incredible creaminess and depth of flavor without overpowering the chocolate. 

Plus, you don't need to add any extra sugar because the chocolate chips provide all the sweetness you need. 

Top it with marshmallows and maybe a drizzle of chocolate and peanut butter sauce, and you've got pure heaven in a mug.

Important tips:
-Be careful not to overheat the chocolate and peanut butter—too much heat will cause the chocolate to harden
-Add the milk SLOWLY to the chocolate mixture and whisk constantly. It makes blending so much easier!
-This recipe makes 4 cups, and leftovers keep for 5 days in the fridge!

This is the ultimate cozy drink for cold winter nights, holiday gatherings, or honestly any time you need a little comfort. It's ready in less than 10 minutes!

Want the full recipe? 💌 Comment 'COZY' below and I'll send you the link!

What's your favorite hot drink for winter? Let me know in the comments! 
#HotChocolateRecipe  #HomemadeHotChocolate #WinterRecipes
When I had a serious craving for pain au chocolat When I had a serious craving for pain au chocolat but didn't want to spend DAYS making croissant dough, I had a brilliant idea: What if I used brioche instead?

And let me tell you... this might be even BETTER than the original!

Brioche au Chocolat gives you all the buttery, flaky flavor of croissants but with the soft, pillowy texture of bread. Plus, that melted chocolate center? Pure heaven! 

The best part is that the entire process is done in a stand mixer, which makes it so much simpler than traditional croissants.

Here's why this recipe is perfect:
🌙 The dough is made overnight, so you can just wake up and bake in the morning
✨ No lamination or complicated folding techniques required
🍫 Each bun has a hidden chocolate surprise in the center
💯 Foolproof method that works every time
🔑 Three tips for success:

Add the butter one tablespoon at a time and let each piece fully incorporate before adding the next (it might look like it won't mix in, then suddenly it disappears!)

The overnight refrigeration is essential—it lets the dough rest AND makes it so much easier to work with.

Don't skip the egg wash! It's what gives these buns their gorgeous golden sheen

These are best served slightly warm (just 10 seconds in the microwave will do!), so the chocolate gets perfectly melty. Trust me, you'll want to make these on repeat!

Want the full recipe? 💌 Comment 'BRIOCHE' below and I'll send you the link!

Have you ever made brioche before? Let me know in the comments! 👇

 #ChocolateBrioche #FrenchPastry #HomemadeBread #BreadBaking

Copyright © 2026 Certified Pastry Aficionado · Web Design by Viva la Violet

loading Cancel
Post was not sent - check your email addresses!
Email check failed, please try again
Sorry, your blog cannot share posts by email.