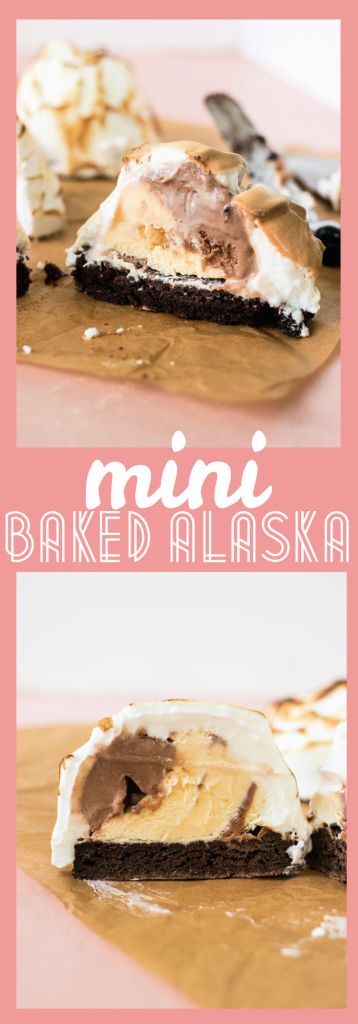
Mini Baked Alaska – Ice cream is placed on top of a brownie, covered in sweet meringue, and toasted to make an beautiful sweet treat with beautiful presentation.
And just like that, we’ve reached the end of July and the end of National Ice Cream Month. To finish off with a bang, I decided to reshoot one of my first recipes EVER on the blog. Many of you probably don’t even know it exists because, well, the photos are ghastly and I never promote the post on social media.
But lucky for you, I’ve remade the original baked Alaskas I made almost 9 years ago, revamped the recipe, and taken much better photos this time around.
Below you’ll find a lot of the same info I gave you in the original post but with much better photos to go along with it. Hope you enjoy!


What is Baked Alaska?
Baked Alaska is a cake topped with ice cream, covered in meringue, and baked until toasted on the outside. You can also use a blow torch to bake the meringue, which makes the process much less stressful, in my opinion. The only other time I ate Baked Alaska was on a cruise and, besides the presentation, it was nothing special; the cake was dry, the meringue flavorless.
But this recipe is one for the books; a rich, chocolate brownie base that kept its texture even after being frozen overnight and paired perfectly with the delicious Neapolitan ice cream. I ate the whole thing in less than 5 minutes (not unusual for me, but still!)
How to make Baked Alaska
Baked Alaska has 4 main steps:
- Make cake bottom
- Top with ice cream
- Cover with fresh meringue
- Bake until meringue is toasted
Making the cake
For this recipe, the cake bottom is very similar to a brownie. The recipe below is super simple to follow but if you want to take a short cut, feel free to use store-bought brownie mix.
After the brownie is done baking and cooling, it’s cut into disks. Baked Alaska is traditionally served in a round, dome-like shape so the bottom also takes the shape of a circle.
As you can see below, you’ll end up with brownie scraps after cutting out the disks, which make an incredible mid-baking snack!

Top with ice cream
Once the disks are cut out, they’re arranged on a baking sheet. I used a small baking sheet since we’re going to place it in the freezer before baking and I want it to fit easily.
Next, each disk of brownie is topped with one scoop of ice cream. I used Neapolitan ice cream for this recipe since it looks fun and give you the best of three different flavors: vanilla, chocolate, and strawberry.

Once all the cakes have been topped, they’re placed in the freezer for a couple hours to firm up. This ensures the ice cream doesn’t melt when we cover in meringue.
Cover with meringue
After the ice cream has frozen solid, it’s time to cover with meringue. The meringue is made from 3 egg whites, sugar, vanilla, and a pinch of cream of tartar and whipped until super stiff. You’ll definitely need a mixer for this step. You can use a hand-mixer or a stand-mixer.
Once the meringue is made, the cakes are covered with meringue completely. I used an offset spatula to make this process easier. But you can simply use a spoon.
Then, the cakes are placed in the freezer for at least 8 hours to really firm up before it’s time to bake them.
Baking the Alaska
Once the cakes have frozen, it’s time to bake them. For this step you can bake them one of two ways:
- Bake in a super hot oven
- Bake with a blow torch
I have done both methods and they each have their benefits.
Baking in the oven
This method does not require any fancy equipment but it can be a little stressful. I mean, you’re putting a frozen dessert into an oven! But don’t worry – it’s just for 3 minutes. The meringue toasts pretty fast. Plus, the cake bottom gets slightly warm during this process, which is an added bonus.
Baking with a blow torch
If you’ve never used a blow torch, this method can be a little intimidating. But it makes the baking process 10000Xx easier. You simply wave the flame around the Alaska to toast the meringue. It takes just seconds for the meringue to turn perfectly toasty on the outside. This method definitely produces prettier results because you have more control over the heat and where it hits the meringue.
FAQs for Baked Alaska
What if the ice cream melts? I mean, baking an ice cream cake?! Ridiculous
But it wasn’t bad! The oven is at reeeeeally high temperature (500 degrees) and the Alaska is only in there for 3 minutes max. But you HAVE to make sure the ice cream is completely frozen before you bake it. I read tons of disaster reviews online where people didn’t wait long enough. Trust me, you do not want to be that person. If you don’t have a single patient bone in your body (like me) you’re gonna wanna grow one for this recipe. Don’t risk it!
You can also choose to use a blow torch (which I’ve done before) and it really takes the stress out of baking the Alaska. However, the texture of the meringue and brownie bottom taste much better after being baked.
500 degrees?! I didn’t know an oven went that high! What if the meringue burns?
Let me tell you…I didn’t take my eyes off that Alaska for one single second while it baked; the recipe said it only took 3 minutes to brown so I knew that if I walked away, it would brown more than I’d like and even…burn (double gasp!). So keep an eye on it and move it around the oven if it’s browning unevenly.
Why so much freezing time??
Because the Alaska is baked in such a high-temperature oven, it’s so important that the cakes stay as cold as possible before they bake. Otherwise, they’ll melt and fall apart. Fun fact: this is also the case for fried ice cream, if you were wondering.

Mini Baked Alaska
Ingredients
For the brownie bottom:
- 7 ounces semi-sweet chocolate
- 6 ounces butter unsalted
- 2 large eggs
- ¾ cup sugar
- ⅓ cup all-purpose flour
- 2 tablespoons unsweetened cocoa powder
- ½ teaspoon baking powder
- ⅛ teaspoon salt
For the Baked Alaska:
- 3 large egg whites
- ¼ cup sugar
- ½ teaspoon pure vanilla extract
- ¼ teaspoon cream of tartar
- 2 cups ice cream
Instructions
- Preheat the oven to 350 degrees (325 degrees if you have a dark pan). Place parchment paper in a 9×9 baking pan. The parchment paper will make it much easier to get the cake out of the pan.
- Melt butter and semi-sweet chocolate in a saucepan on low. This takes some time. But resist the urge to turn up the temperature or putting it in the microwave; you could burn the chocolate. And there’s no coming back from that, people.
- While the chocolate is melting, mix the eggs and 3/4 cup sugar until combined. Sift the flour, baking powder, salt, and cocoa together, to prevent lumps. By this time, the chocolate should be ready (or close). Let the chocolate cool down before adding it to the egg and sugar mixture; we don’t want those eggs to scramble.
- After you mix in the chocolate, mix in the dry ingredients slowly, about ½ of a cup at a time. This will prevent the mix from lumping and make it easier to combine. Pour the mixture in the prepared pan and bake for about 15 minutes or until a toothpick comes out clean when inserted in the center.
- When the brownie is done, cool it to room temperature so the brownie doesn’t fall apart when you take it out of the pan. Once the brownie cools, use a 3 inch cutter (or the rim of a glass) to make about 6 brownie discs. Place all the brownie discs on a baking sheet, lined with parchment paper. Place a small scoop of ice cream (about ⅓ of a cup) in the middle of each disc so that there is a ½ inch space left between it and the edge of the cake. Freeze until solid, about 2 hours.
- When the ice cream is almost ready, start making the meringue. Add the vanilla and cream of tartar and start beating the whites on high. Add 1/4 cup of sugar slowly, about one tablespoon at a time. Keep beating the meringue until it turns into stiff peaks.
- Take the ice cream out of the freezer. Place 2 rounded tablespoons of meringue on each portion of ice cream. Use a knife or offset spatula to spread the meringue all over until you can no longer see any cake or ice cream. You can make little designs on the meringue using a fork or spoon. Don’t be afraid to get creative! Refreeze the cakes overnight or for at least 8 hours.
- The next day (or whenever you are ready to serve them), remove the cakes from the freezer. Using a blow torch, toast the meringue evenly for every cake. Alternatively, you can bake the alaskas in the oven. See directions in the notes below.
Notes
Pin for later:
More recipes you’ll love:
Molten Chocolate Cake

Chocolate Peanut Butter Souffle

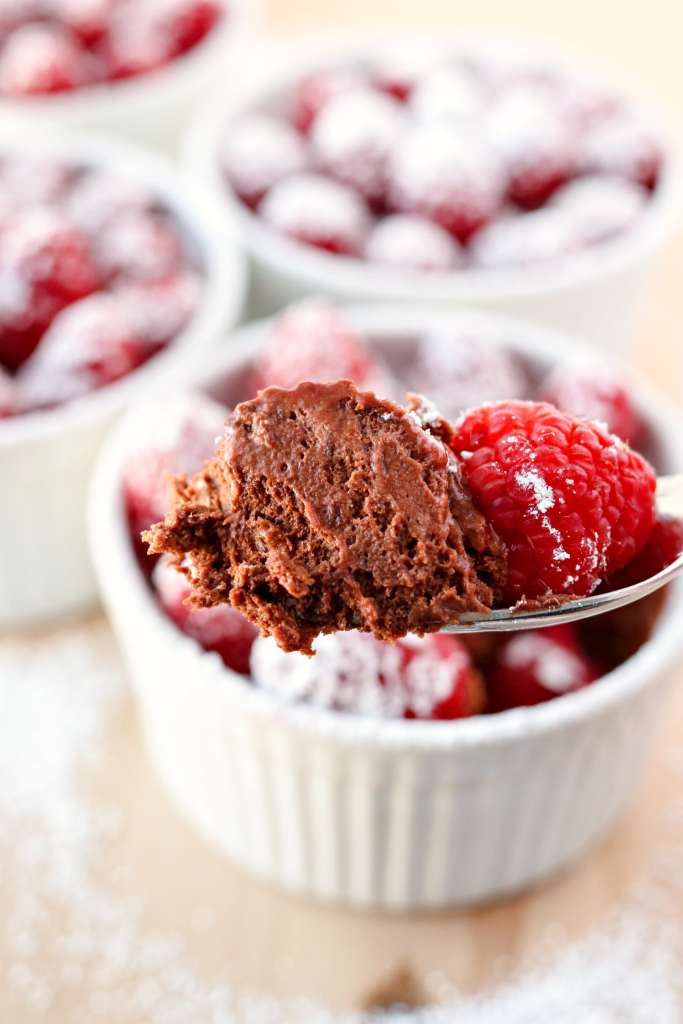
Chocolate Raspberry Mousse


Hi! I can’t wait to make this recipe. Does freezing the meringue before toasting it change the texture? Thank you.
I guess this is one of those dessert recipes that I am yet to try. Definitely unique and not something you can see too often. Can’t wait to have it on my plate! 🙂
What a delicious looking dessert! I have never tried making Baked Alaska, but it looks pretty easy!
This is literally the most perfect dessert recipe out there! It doesn’t get any better than brownie, ice cream, and meringue!
What a fantastic idea to make it into a mini version of a regular baked Alaska. How much neater it is to serve and to eat. I love it. I’ve got a special event coming up and this dessert is perfect. Thank you for the inspiration.
This is one dessert I’ve always wanted to try! I love your mini versions…such a fun treat to make for the summer. These look perfect!
This looks like such a delicious recipe! I have never made this before, but can’t wait to try it…YUM!!!
As with all of your recipes you leave me wondering, “Why didn’t I think of that!?!?” These mini baked Alaskas are so cute and perfect for my little family.
This baked Alaska is so delicious and I love the brownie on the bottom. Making this again soon!
I have always wanted to try baked Alaska, because it looks so good! I think I’ll try to make this next week and see how it goes!
This Mini Baked Alaska is making me drool! It looks really mouthwatering and super delicious!
Omg! I have childhood memories just looking at this. I loveee baked alaska and I am over here drooling right now
What a great idea!! These mini “alaskas” are so cute! I’ve never made baked alaska before but your recipe has totally inspired me to try!!
OMG…this looks so delicious. I’ve never heard the name os this dessert before but I can tell it’s perfect for summer!
I’ve shied off making baked alaska in the past because it looked too hard, but you make it seem effortless. They are so beautiful! Can’t wait to try.
These are so delicious! They are so impressive, too – perfect for entertaining. We love anything in mini form 🙂
These mini baked Alaska treats are so delicious! I love how all the components come together so beautifully!
Oh, I’m such a sucker for mini desserts, and these little baked Alaskas are too cute! These will be the perfect summer treats — you can’t go wrong when brownies and ice cream come together.
These little Baked Alaska’s are absolutely adorable. Kudos to you for giving them a try…I’ve never made one but I sure love to eat them!