• Facebook
  • Instagram
  • Pinterest
  • RSS
  • Twitter
  • Home
  • About Me
  • Recipes
  • Cookbooks
  • Work With Me
  • Contact

CPA: Certified Pastry Aficionado

Raspberry Lime Macaron Sandwich

Cookies· dessert· Easter· Holiday Favorites· Valentine's Day
June 19, 2023

Jump to Recipe Print Recipe

Raspberry Lime Macaron Sandwich – Large, pink macaron shells are filled with fresh lime curd and whole raspberries and sandwiched together for a snack fit for a queen.

raspberry lime macaron sandwich on a white plate with lime zest garnish

Today’s treat is inspired by a dessert I’ve enjoyed many times at Disney’s Epcot. The France pavilion has a wonderful patisserie with baked breads, pastries, and desserts. I always get this Raspberry Lime Macaron Sandwich because I love the combination of the raspberries, lime curd, and chewy almond macaron shell. Sweet, sour, chewy, and creamy all on one dessert. How could you NOT love it?!

Because I love making macarons at home, it was an easy new recipe for me to try out. The major differences in this macaron sandwich versus my classic macarons are the size of the macaron shells. These macaron shells are almost twice the size, which means a needed a new macaron template. I’ve linked the one I used in the recipe notes.

Here are my Raspberry Lime Macaron Sandwiches!

a far shot of the raspberry lime macaron sandwich on a white place with lime curd in the background
open faced raspberry lime macaron sandwich on a pink tabletop
close up of a raspberry on the pink tabletop

Tips & Tricks

In case this is your first time making macarons, here are few tips to give you confidence before you get started:

  1. Learn from my mistakes. Make sure you read my post about Nutella Macarons. I talk all about the techniques I learned when taking a macaron baking class. There is tons of valuable information there so don’t skip this read!
  2. Use all the batter. Macaron batter is very sticky. In order to get all the batter out of the pastry bag, use a bench scrapper to push it down the bag.
  3. Gel food coloring. I used pink food coloring gel to get the pretty macaron color. But I think red food coloring gel would get you a pretty pink color, as well. Just use about half as much so it’s not too deep of a red.
  4. Don’t use a metal bowl! When making lime curd, it’s important to not make in a metal bowl, otherwise, the curd will have a metallic taste.
  5. Chill the lime curd. Curd gets thick when it cools. So you much cool it completely to ensure it doesn’t run out of the macaron sandwich.
Print Recipe

Raspberry Lime Macaron Sandwiches

Prep Time45 minutes mins
Cook Time25 minutes mins
Total Time1 hour hr 10 minutes mins
Servings: 4 large sandwiches

Ingredients

For the macaron sandwich:
  • 3.5 ounces powdered sugar
  • 2 ounces almond flour
  • 2 ounces egg whites
  • 1.75 ounces granulated sugar
  • 1 pinch cream of tartar (less than 1/8 teaspoon)
  • 1/4 teaspoon pink gel food coloring
  • 24 fresh raspberries
  • 4 tablespoons fresh lime curd recipe below
For the lime curd:
  • 4 teaspoons lime zest
  • ½ cup fresh lime juice
  • ¾ cup sugar
  • ⅛ teaspoon salt
  • 3 large eggs
  • 3 large egg yolks
  • 4 tablespoons butter unsalted, cold

Instructions

For the macaron sandwiches:
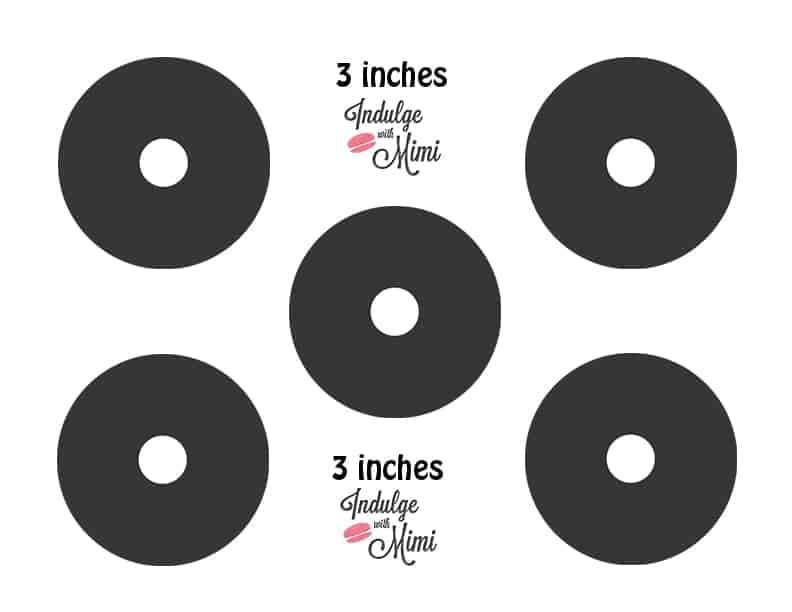
  • Prepare one baking sheets by placing two 3-inch macaron templates on baking sheet. You can print the templates by going to the link in the notes. Place parchment paper or silicone mats over the templates. Set baking sheet aside.
  • Place oven rack in the lower half of the oven, but not all the way to the bottom. Preheat oven to 300 degrees.
  • Add powdered sugar and almond flour to the bowl of a food processor. Process the ingredients for about 30 seconds so that the mixture is super fine. Sieve the flour and sugar mixture three times. Set mixture aside.
  • In the bowl of a stand mixer with a whisk attachment, add egg whites and cream of tartar and begin to beat on medium-high until it begins to foam. Once it starts to get foamy, begin to slowly sprinkle the granulated sugar into the egg whites until it’s all been incorporated. Increase the speed to high to whip the meringue into stiff peaks. The meringue should have the consistency of shaving cream, NOT soft serve. Add food coloring and mix to combine. If you want a deeper color, add a little bit more coloring. But a little goes a long way.
  • Once the meringue is done, add one-third of the sifted flour mixture to the meringue and fold with a spatula. Do this step very carefully and slowly, cutting the mixture down the middle and swooping around. Once it’s incorporated, add a second-third and gently fold in. Then, add the final third. Mix just until it’s incorporated. Do not over mix. The consistency should be like slow-moving lava. To check for consistency, the batter should flow from your spatula like thick lava and hold a ribbon for a couple seconds. If it falls into clumps and doesn’t fall slowly, it is not mixed enough. Keep mixing slowly so that the batter deflates a bit and the proper consistency is reached.
  • Transfer batter to a piping bag fitted with a smooth, large round tip. Squeeze out the batter into the center until the batter reaches the edge of the macaron template. Repeat with other 7 templates. When you get to the end of the batter, a lot of it will stick to the bag. To push the excess batter down the bag, use the edge of a bench scrapper.
  • After you've pipped all the circles, smack the baking sheets on the counter a couple times to release air bubbles. Use a toothpick to pop all the air bubbles. If you don't do this step, the air bubbles will release steam while baking and crack the shells.
  • Let them sit to dry out until the tops are smooth to the touch, about 30 minutes. They are done when you rub your finger over the top and your finger doesn’t stick.
  • Bake macaron shells in preheated oven for 15-18 minutes or until they easily lift off the silicone baking mat.. Make sure to rotate the sheet halfway through, for even baking. Remove from oven and let them cool for 5 minutes before transferring to a wire rack to finish cooling.
  • Lay half of the macarons flat side up on a baking sheet. Arrange 6 fresh raspberries, open side down, around the outside of the shell. Spoon about 1 tablespoon of lime curd into the center of the raspberries. Top with the other shell and gently press down. Do this for all the macaron shells until done.
  • Once filled, macarons can be refrigerated in an airtight container for up to 1 day.
For the lime curd:
  • Fill a medium sauce pan with about an inch of water. Set over medium heat. Place a non-metal bowl on top of the sauce pan, making sure it's big enough not to touch the water.
  • Add the sugar, 1 tablespoon of lime zest, lime juice, and salt to the bowl and whisk together. Add eggs and egg yolks and whisk together until smooth. Continue to whisk as the curd cooks and thickens up, about 6-8 minutes. Do not let the mixture get more than 170 degrees. Remove from heat.
  • Add butter 1 tablespoon at a time, whisking after each addition until smooth. Add remaining lime zest and stir together. Place a piece of plastic wrap on top of the curd and place in the refrigerator until chilled completely, about 8 hours.

Notes

For the macaron template, I used this printable

Pin for later:

pin of raspberry lime macaron sandwich

More recipes you’ll love:

Raspberry Heart Macarons
raspberry macaron hearts stacked on a baking pan with more macarons placed around the pan and sprinkled powdered sugar, shot from a side angle
Lemon Raspberry Parfaits
styled shot of lemon raspberry parfaits on a cloth napkin with a spoon next to it and raspberries in the background, shot from a side angle
Raspberry Lemon Sorbet
lemons with the top off filled with Raspberry Lemon Sorbet on a plate, shot from a side angle

Share this:

  • Click to share on Pinterest (Opens in new window)
  • Click to share on Facebook (Opens in new window)
  • Click to share on Twitter (Opens in new window)
  • Click to share on Tumblr (Opens in new window)
  • Click to email this to a friend (Opens in new window)

15 Comments

« Fried Onion Petals
Avocado Margaritas »

Comments

  1. Erin says

    June 26, 2023 at 12:11 am

    These sandwiches are so cute! I love the color and I have a bag of almond flour that’s just waiting for them. 🙂

    Reply
  2. Lori | The Kitchen Whisperer says

    June 25, 2023 at 9:11 pm

    Yes.. simply YES to all of this entire recipe! These are outstanding! They were perfect for a bridal shower I had to go to. These stole the show to be honest! These are so worth the time making!

    Reply
  3. Veronika says

    June 25, 2023 at 3:33 pm

    I love getting these from Laduree! I can’t believe I can make them myself at home now! The macaron was so light and airy.

    Reply
  4. Ann says

    June 25, 2023 at 10:47 am

    I am still trying to perfect my macaron making skills. I am excited to try these – I have not made this flavor before!

    Reply
  5. Amy Liu Dong says

    June 25, 2023 at 5:46 am

    This treat is too cute to eat!
    It looks delicious and looks so easy to make.
    I can’t wait to make this at home!

    Reply
  6. Lisa says

    June 24, 2023 at 12:41 pm

    These are so pretty and I love that there are whole raspberries in the center. They look like they came from a French bakery!

    Reply
  7. Jessica says

    June 24, 2023 at 10:39 am

    Such a sweet little treat! I loved that these were bigger than the traditional macaroon, and the tart/sweet combo was just right. thanks!

    Reply
  8. Lauren Michael Harris says

    June 22, 2023 at 12:29 pm

    I love how you used fresh raspberries in the filling to make them even prettier. The raspberry lime flavor combination is soooo good!

    Reply
  9. Loreto and Nicoletta Nardelli says

    June 21, 2023 at 12:35 pm

    These macaron sandwiches are such a pretty, fun, and delightful treat! Will try making them following all your suggestions! Thank you!

    Reply
  10. Colleen says

    June 20, 2023 at 7:26 pm

    These macaroons are a perfect treat. I am making them for a baby shower I’m hosting and I know they’ll be a hit!

    Reply
  11. Nathan says

    June 20, 2023 at 5:12 pm

    It’s been a long time since I attempted to make macarons, but these look so perfect for the summer that I’m going to have to make another attempt! Thanks for the recipe, can’t wait to see how they turn out!

    Reply
  12. Farwin says

    June 20, 2023 at 4:59 pm

    These macarons are so cute. The flavor combo is so awesome and they’re on my must-try list.

    Reply
  13. Renee says

    June 20, 2023 at 3:31 pm

    These macarons are a match made in heaven! Love that flavor combo, and they look beautiful, too! Thanks so much!

    Reply
  14. Neha says

    June 20, 2023 at 3:24 pm

    Oh looks like a perfect sandwich to me! Love the color and its flavors. I truly can’t wait to try it out.

    Reply
  15. Cathleen says

    June 19, 2023 at 10:51 pm

    These macarons are perfect!! I love this combo, so I know that I will be making this over and over. Thank you so much for the recipe 🙂

    Reply

Leave a Reply Cancel reply

Your email address will not be published. Required fields are marked *

This site uses Akismet to reduce spam. Learn how your comment data is processed.

Hi, my name is Sharon. I’m an accountant by day, risk-taking baker and food enthusiast by night. Come join me as I share my favorite recipes and test out new ones along the way!

fall flavors

a hand holding up a cinnamon bun soft pretzel

Cinnamon Bun Soft Pretzels

two mugs of Cinnamon Maple Latte topped with whipped cream and sprinkled with pecans with dunkin donuts creamer and a stack of pumpkins on top of a cloth napkin, shot from a side angle

Cinnamon Maple Latte

apple pie egg roll dipping in caramel sauce

Apple Pie Egg Rolls

side shot of banana bread doughnuts on a purple plate with more doughnuts in the background

Banana Bread Doughnuts

styled shot of Sparkling Apple Cider Sangria

Sparkling Apple Cider Sangria

picture of apple pecan farro salad served on a white plate

Apple Pecan Farro Salad

ORDER MY NEW COOKBOOK NOW!

photo of entertaining made easy cookbook available for preorder now

Breakfast
Appetizers
Entrees
Salads
Sides
Drinks
Desserts
Roundups
Holidays

Browse by Date

  • Home
  • About Me
  • Contact Me
  • Privacy Policy

holiday favorite

photo of creme brulee doughnuts stacked together with the top doughnut missing a bite

Crème Brûlée Doughnuts

plate of bananas foster french toast casserole on a plate with a bottle of syrup and a baking dish with casserole in the background, shot from the front

Bananas Foster French Toast Casserole

picture of fried goat cheese balls stacked on an appetizer plate with honey drizzling over the top

Fried Goat Cheese Balls

styled shot of Sweet Yeast Rolls on a plate with a bowl of Whipped Pumpkin Butter and a basket of rolls and a pumpkin in the background, shot from a side angle

Sweet Yeast Rolls with Whipped Pumpkin Butter

close up of banana fritter with a bite removed sitting on a plate with other banana fritters

Banana Fritters


Do you remember those Danish butter cookies that c Do you remember those Danish butter cookies that came in the fancy blue tin? The ones your mom would buy every Christmas and you'd go absolutely CRAZY for? 

Well, guess what? You can make them YOURSELF! And they're shockingly simple!

I'm talking about those perfectly crispy-on-the-outside, melt-in-your-mouth-on-the-inside shortbread cookies that are basically edible butter. And honestly? 

I don't think they should be reserved just for the holidays. These cookies deserve to be eaten ALL YEAR LONG!

Here's what makes them so special:
-The Recipe: Only FIVE ingredients—butter, flour, sugar, eggs, and vanilla. That's it! If you can cream butter and sugar together, you can make these.
-The Texture: They're like shortbread cookies but slightly softer, so when you bite into them, they literally melt in your mouth. It's pure butter heaven.
-The Secret: Use European-style butter! It has a higher fat content which makes these cookies extra creamy and flavorful. It's worth the upgrade, I promise!

Important tips:
Be VERY careful measuring your flour—too much and the dough will be impossible to pipe
Use a LARGE star tip (not a small one!) or you won't be able to squeeze the dough out
These actually taste BETTER after they cool! The crispiness is what makes them so good, so resist eating them warm (I know it's hard!)

These are perfect for coffee breaks, gift-giving, parties, or honestly just because you deserve a good cookie. You can make them in under an hour from start to finish!

Want the full recipe? 💌 Comment 'BUTTER' below and I'll send you the link!

#DanishButterCookies #ButterCookies #ShortbreadCookies #HolidayBaking #CookieRecipe #HomemadeCookies
After making approximately ONE MILLION pumpkin tre After making approximately ONE MILLION pumpkin treats recently, I was desperate for something with all those cozy fall vibes but maybe... a little less pumpkin? 

So I set my sights on something that doesn't get nearly enough love in the dessert world: SWEET POTATOES! 

And here's my controversial opinion: Sweet potato beats pumpkin ANY DAY OF THE WEEK. There, I said it! 

These Sweet Potato Cupcakes are super moist, perfectly spiced, and topped with the creamiest cinnamon cream cheese frosting. 

They taste similar to pumpkin cupcakes (so if you're a die-hard pumpkin lover, you can absolutely swap in pumpkin puree!), but here's why sweet potato wins:
✨ More starch = MORE moisture and density in the cupcake
✨ The flavor is 100x better (fight me on this!)
✨ That perfect balance between sweet and earthy

But what I'm MOST proud of is how the frosting and cake work together. You know how sometimes you get a cupcake with frosting that's way too sweet so you just eat the cake? Or killer frosting but blah cake so you only eat the frosting? NOT THIS CUPCAKE. 

The spiced cake needs a little sweetness to balance it out, and the tart cream cheese frosting is PERFECT. They're soulmates! 

Important tips:
-Don't undercook them or they'll sink in the center (but more frosting fixes everything!)
-Fill the liners 3/4 full—not all the way—to get exactly 12 cupcakes
-Use a 2M Wilton tip for that fancy frosting swirl (or just spread with a knife!)

Want the full recipe? 💌 Comment 'CUPCAKE' below and I'll send you the link!
Team Sweet Potato or Team Pumpkin? Let me know in the comments! 

#SweetPotatoCupcakes #CreamCheeseFrosting  #CupcakeRecipe
Y'all, I need to talk about these Kentucky Derby C Y'all, I need to talk about these Kentucky Derby Cookie Bars because they might just be the most decadent thing I've ever created!

So here's the deal: I love taking traditional recipes and giving them a major upgrade. 

Traditional Derby Pie is delicious, but I wanted to make something even MORE special. And these bars? They're Derby Pie on steroids!

Here's what makes them absolutely incredible:
The Cookie Crust: Instead of regular pie crust, we're using a thick chocolate chip cookie base. Game. Changer.
The Filling: Loaded with pecans, chocolate chips, and a hint of bourbon that adds this rich, complex flavor. The filling is more dense and cakey than traditional Derby Pie, which gives you the perfect chewy texture.
The Bourbon Caramel: This homemade bourbon caramel sauce is what takes these bars over the top. It's sweet, buttery, and has that gorgeous bourbon depth. And yes, the alcohol cooks out, so it's safe for everyone (even made these while I was pregnant!)!

Important tips:
Don't chop your pecans too finely—leave nice chunks for better texture
If the bars start browning too quickly, just cover them with foil while the center finishes baking
Don't over-thicken the caramel sauce on the stove—it will thicken as it cools!

These bars are perfect for Derby Day (obviously!), but honestly, they're amazing for any summer gathering, BBQ, or potluck. 

Want the full recipe with that bourbon caramel sauce? 💌 Comment 'DERBY' below and I'll send you the link!

#DerbyPie #CookieBars #BourbonDesserts #PecanDesserts
Y'all, I just made the BEST hot chocolate of my li Y'all, I just made the BEST hot chocolate of my life and I need you to try it immediately!

Growing up, I only knew hot chocolate from those packets where you just add hot water. I had NO idea you could make it from scratch so easily! 

All it takes is hot milk, cocoa powder, chocolate chips, and the secret ingredient... PEANUT BUTTER!

I've always been obsessed with the peanut butter and chocolate combo (if you've been following me, you know this is true!), but for some reason, it never occurred to me to add it to hot chocolate until recently. And now I'm officially never going back to regular hot chocolate!

What makes this recipe so special? The peanut butter adds this incredible creaminess and depth of flavor without overpowering the chocolate. 

Plus, you don't need to add any extra sugar because the chocolate chips provide all the sweetness you need. 

Top it with marshmallows and maybe a drizzle of chocolate and peanut butter sauce, and you've got pure heaven in a mug.

Important tips:
-Be careful not to overheat the chocolate and peanut butter—too much heat will cause the chocolate to harden
-Add the milk SLOWLY to the chocolate mixture and whisk constantly. It makes blending so much easier!
-This recipe makes 4 cups, and leftovers keep for 5 days in the fridge!

This is the ultimate cozy drink for cold winter nights, holiday gatherings, or honestly any time you need a little comfort. It's ready in less than 10 minutes!

Want the full recipe? 💌 Comment 'COZY' below and I'll send you the link!

What's your favorite hot drink for winter? Let me know in the comments! 
#HotChocolateRecipe  #HomemadeHotChocolate #WinterRecipes
When I had a serious craving for pain au chocolat When I had a serious craving for pain au chocolat but didn't want to spend DAYS making croissant dough, I had a brilliant idea: What if I used brioche instead?

And let me tell you... this might be even BETTER than the original!

Brioche au Chocolat gives you all the buttery, flaky flavor of croissants but with the soft, pillowy texture of bread. Plus, that melted chocolate center? Pure heaven! 

The best part is that the entire process is done in a stand mixer, which makes it so much simpler than traditional croissants.

Here's why this recipe is perfect:
🌙 The dough is made overnight, so you can just wake up and bake in the morning
✨ No lamination or complicated folding techniques required
🍫 Each bun has a hidden chocolate surprise in the center
💯 Foolproof method that works every time
🔑 Three tips for success:

Add the butter one tablespoon at a time and let each piece fully incorporate before adding the next (it might look like it won't mix in, then suddenly it disappears!)

The overnight refrigeration is essential—it lets the dough rest AND makes it so much easier to work with.

Don't skip the egg wash! It's what gives these buns their gorgeous golden sheen

These are best served slightly warm (just 10 seconds in the microwave will do!), so the chocolate gets perfectly melty. Trust me, you'll want to make these on repeat!

Want the full recipe? 💌 Comment 'BRIOCHE' below and I'll send you the link!

Have you ever made brioche before? Let me know in the comments! 👇

 #ChocolateBrioche #FrenchPastry #HomemadeBread #BreadBaking

Copyright © 2026 Certified Pastry Aficionado · Web Design by Viva la Violet

loading Cancel
Post was not sent - check your email addresses!
Email check failed, please try again
Sorry, your blog cannot share posts by email.